Generating Ad Code
Generating Ad Code for a Site
- Click on Inventory --> Sites
- Click the three dots on far right --> Get Ad Code

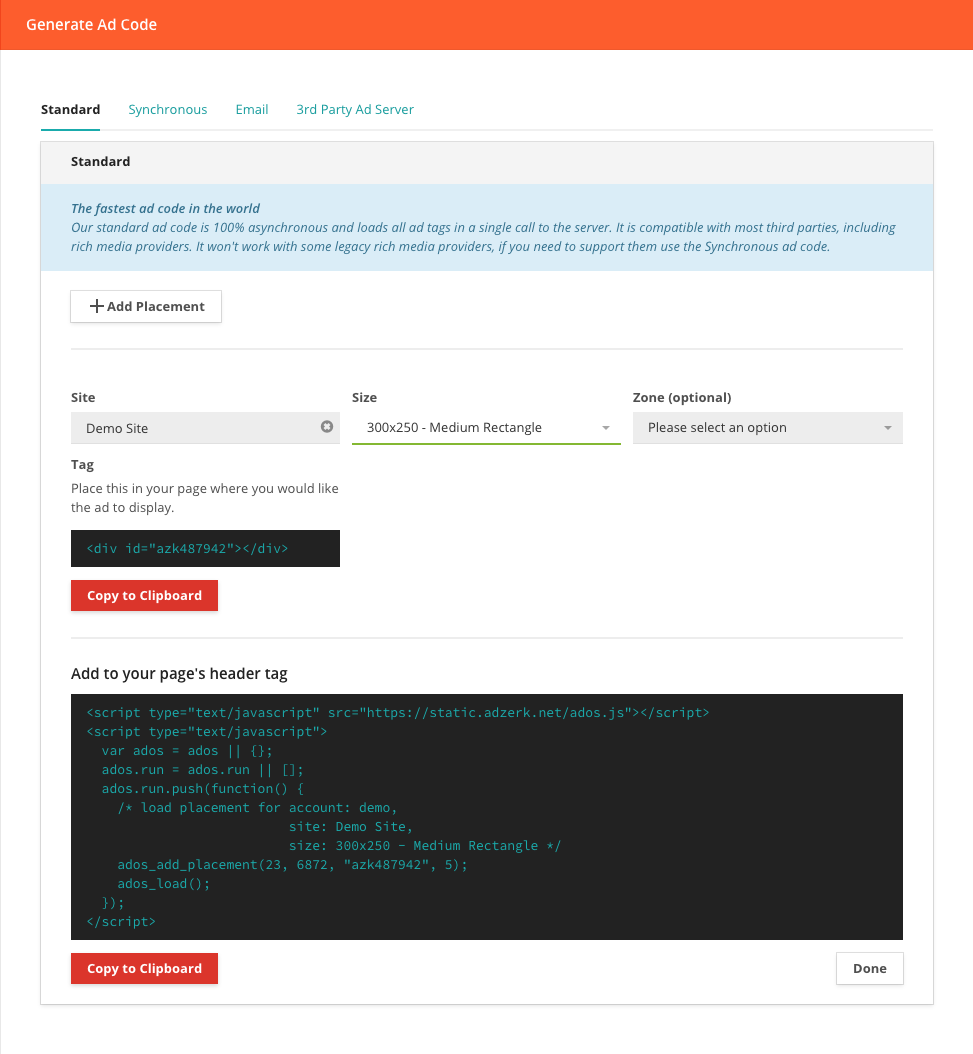
Most times when generating ad code, you'll want to use the Standard ad code option. However, you may also use the Synchronous option (if the page doesn't support async JavaScript calls), the Email option (for environments like email where JavaScript code doesn't work) and the 3rd Party Ad Server option (to traffic your tags on another platform). You can select those options on this page.
- Choose Ad Size, which will produce the tag automatically
- Place the Tag (shorter code) where you would like the ad to display
- Add the Header Tag (longer code) to your site's header

You can use the "Copy to Clipboard" buttons to copy the div or JavaScript blocks of code to your clipboard.
- If you need to add another placement to the page, use the "+ Add Placement" button. This will create a new div and update the JavaScript tag.
Before you place the tags on a page, check that each div matches its corresponding ID in the Javascript. For example:
<div id="azk75686"></div>should match
ados_add_placement(650, 16803, "azk75686", 4);or the ad code will not serve ads.
Generating Ad Code For Campaigns, Flights, and Ads
You can also generate ad code for a specific campaign, flight, or ad. In Kevel this is called force targeting. To do this:
- Go to Campaigns --> Campaigns or Flights or Ads
- Click the three dots on far right
- Select "Generate Ad Code"

You'll be redirected to the generate ad code page described in the section above. However, there is one important difference: a checkbox that enables you to generate ad code for just that campaign, flight, or ad. By default, this checkbox is checked.

To use this page like the site ad code page, just uncheck the box. With the checkbox unchecked, the ad code you generate will be able to serve any eligible campaign, flight or ad.
Updated 5 months ago
