Conversion Tracking
Conversion tracking enables you to send Kevel the conversion events you or your advertisers can trigger
Conversions vs Purchases
Conversions are events sent to Kevel with a tie already made to a specific ad. Most commonly when you have your own Attribution engine running and want to simply tell Kevel which ad should be credited and by how much. A simple attribution engine is also available via the use of the conversion pixel below.
For most cases - particularly in retail media - you will not be sending Conversions but integrating using Kevel's own Attribution engine via the Purchase endpoint.
Conversions overview
Conversions (or actions) are post-click events, such as signing up for a newsletter or making a purchase.
Conversions are tracked in three different ways:
- Events
- Pixels
- Server-to-server calls.
CautionYou can only request conversions via events if you are using the Decision API.
There are three types of conversions:
-
View Conversions - the user viewed the ad and then made a conversion (i.e., the impression caused the person to later visit the page/site and make an action). Only applicable with pixel method.
-
Click Conversions - the user clicked the ad and then made an action.
-
Sever-to-Server Conversions - A user or advertiser decided when to ping Kevel with a conversion event.
In Reporting, the user can view both view-through and click-through conversions separately.
Calling Event Conversions via the Decision API
- In the Decision API request, make a request for eventIds 1, 2, or 3.
1 = View Conversion
2 = Click Conversion
3 = Server to Server Conversion
The example below illustrates how to make a request for eventIds.
curl -H 'Content-Type:application/json' -X POST -d '{"placements":[{"divName":"div1","networkId":1234,"siteId":12345,"adTypes":[5],"eventIds":[1]}]}' https://e-1234.adzerk.net/api/v2- The Decision API response delivers an event URL that calls the conversion:
"events": [
        {
          "id": 1,
          "url": "https://e-1234.adzerk.net/e.gif?e=eyJhdiI6ODU2NzEs..."
}- Select this event URL at the time the conversion takes place. If the advertiser determines when a conversion happens, send this event URL to the advertiser so it can be selected.
- The conversion is then recorded in reporting.
Enabling Pixel Conversions with the UI
For pixel tracking, the user or the advertiser adds that pixel to the event confirmation page. When it fires, Kevel records a conversion for the user.
NoteConversion pixels live at the Advertiser-level.
Add the pixel to the site if using Sponsored Listings or a similar Native Ad Unit that does not require the user to leave the site. The advertiser should install the pixel if the conversion event is on their site.
- To use pixel conversions, go to the Flight's General Settings page and click the Track Conversions checkbox next to Rate and Price

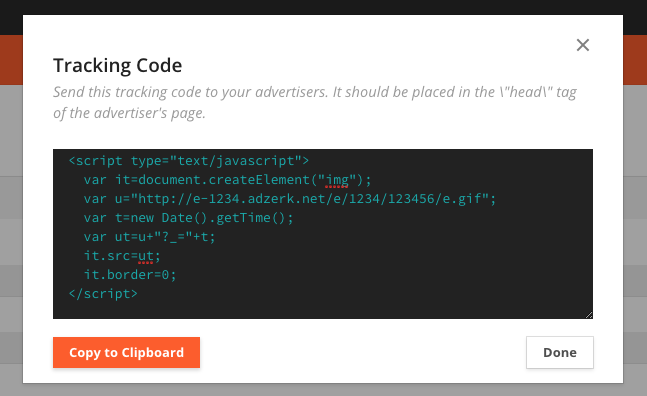
- Click 'Show Code' to retrieve the Pixel code. Choose to send this to an advertiser if the conversion event is off the site.

- Place or have the Advertiser place this in the
headof the page they want to trigger a conversion event
Generating Tracking Pixel without JavaScript
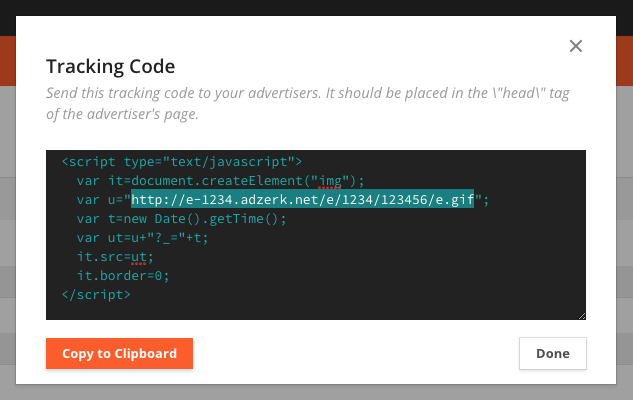
If an advertiser cannot use JavaScript, generate a new tracking pixel. After generating the tracking code, copy the URL from inside that script and add ?[randomnumber] to the end of the URL, where [randomnumber] is a random number.

This is the tracking pixel. The script in the Show Code pop-up window generates a tracking pixel with a random number attached, so creating a new tracking pixel accomplishes the same thing.
How Pixel Conversions Work
When Kevel records an impression or click for a conversion-enabled flight, Kevel adds details about that impression or click to a cookie stored on the user's browser, azk-events. This cookie can store up to 20 conversions per user, or 4KB of data (whichever happens first).
When a conversion pixel is triggered, Kevel associates the conversion in reporting and data shipping with the most recent impression or click stored on the cookie.
Conversions for the same advertiser, flight, etc. can be triggered multiple times, and each time they are triggered, the most recent impression or click is associated with that conversion. The conversion will be dated from when the most recent impression or click event occurred.
For instance, if a user converts on October 1 after viewing an impression on September 30, Kevel counts a conversion on September 30 in reporting, and that conversion is associated with the impression in data shipping. If the same user converts on October 2 after a click on that date, Kevel counts another conversion on October.
Additional Parameters
Some additional parameters that can be appended to the pixels are:
- override: replaces the revenue value of the conversion (f.e. appending ?override=1.23 would set the revenue to $1.23).
- additional: adds the specified value to the original revenue value of the conversion (e.g. appending additional=1.23 would add $1.23 to the original revenue for the conversion).
Enabling Conversion Tracking with the API
Use the Create Flight endpoint to set-up Conversion Tracking.
Beyond the standard parameters, set IsTrackingConversions to true:
flight={
  "Name":"Jazzercise North Carolina Weekends",
  "StartDateISO":"2017-05-01T00:00:00.00.0000000",
  "EndDateISO":"2017-12-31T00:00:00.00.0000000",
  "CampaignId":1234,
  "PriorityId":1234,
  "GoalType": 1,
  "IsTrackingConversions": true
}
Then, to retrieve the tracking code itself, ping the Get Conversion Tracking Pixel endpoint.
curl -X GET -H 'X-Adzerk-ApiKey:<APIKEY>' https://api.kevel.co/v1/advertiser/12345/trackingCodeExample Response:
{
   "trackingCode": "<script type=\"text/javascript\">var it=document.createElement(\"img\");var u=\"https://e-1234.adzerk.net/e/1234/12345/e.gif\";var t=new Date().getTime();var ut=u+\"?_=\"+t;it.src=ut;it.border=0;</script>"
}
Conversion Reporting
In the user interface, information can be viewed by running a Custom Report and clicking the checkbox next to Flight in the GroupBy section.
NoteIf conversion tracking is enabled for a Flight, the conversion column automatically appears.
If a user collects multiple conversions for the same advertiser, Kevel attributes a conversion to the most recent ad/creative/flight/campaign that the user converted on. For example, if a user converts on the Nike flight "Shoes 1" and later on "Shoes 2", Kevel counts the conversion for "Shoes 2."
Conversions in the Reporting API
Conversions are represented as Events in a polled API report. Each EventId corresponds to a conversion type.
"Events": {
              "1": 3,
              "2": 6
          },
1 = View Conversion
2 = Click Conversion
3 = Server Conversion
Updated 5 months ago
