
Yield Forecast
Empower ad sales and operations with a tailored view of your future inventory
Yield Forecast is the way your teams can visually see your future inventory and its fill rate and yield. It lists your standard Ad Products with the corresponding availability forecast, so you can always understand how much is still possible to sell and what will be the effective eCPMs for those Ad Products, according to currently booked campaigns.
Navigate to Yield Forecast within Inventory > Yield Forecast.

The Yield Forecast is divided into two sections:
- Yield forecast overview: this is your ad sales and business users interface. You can pick date ranges and see both the overall inventory as well as breakdown by the Ad Products pre-built, no configuration or custom reporting required.
- Yield forecast settings: this is your ad operation managers settings area, where existing Ad Products can be edited and new ones created. It's also where you can configure overall settings, such as how to break down each Ad Product or your defined priority for each channel.
Initial setupIn order to first use the Yield forecast, the "Paid Inventory Priorities" must be set via the Forecast Settings page. This lets you define which Priorities should be considered "unsold," such as. House-level ad priority. You'll also define your lowest paid Priorities you have for each of your network's channels.
Yield forecast overview
All inventory
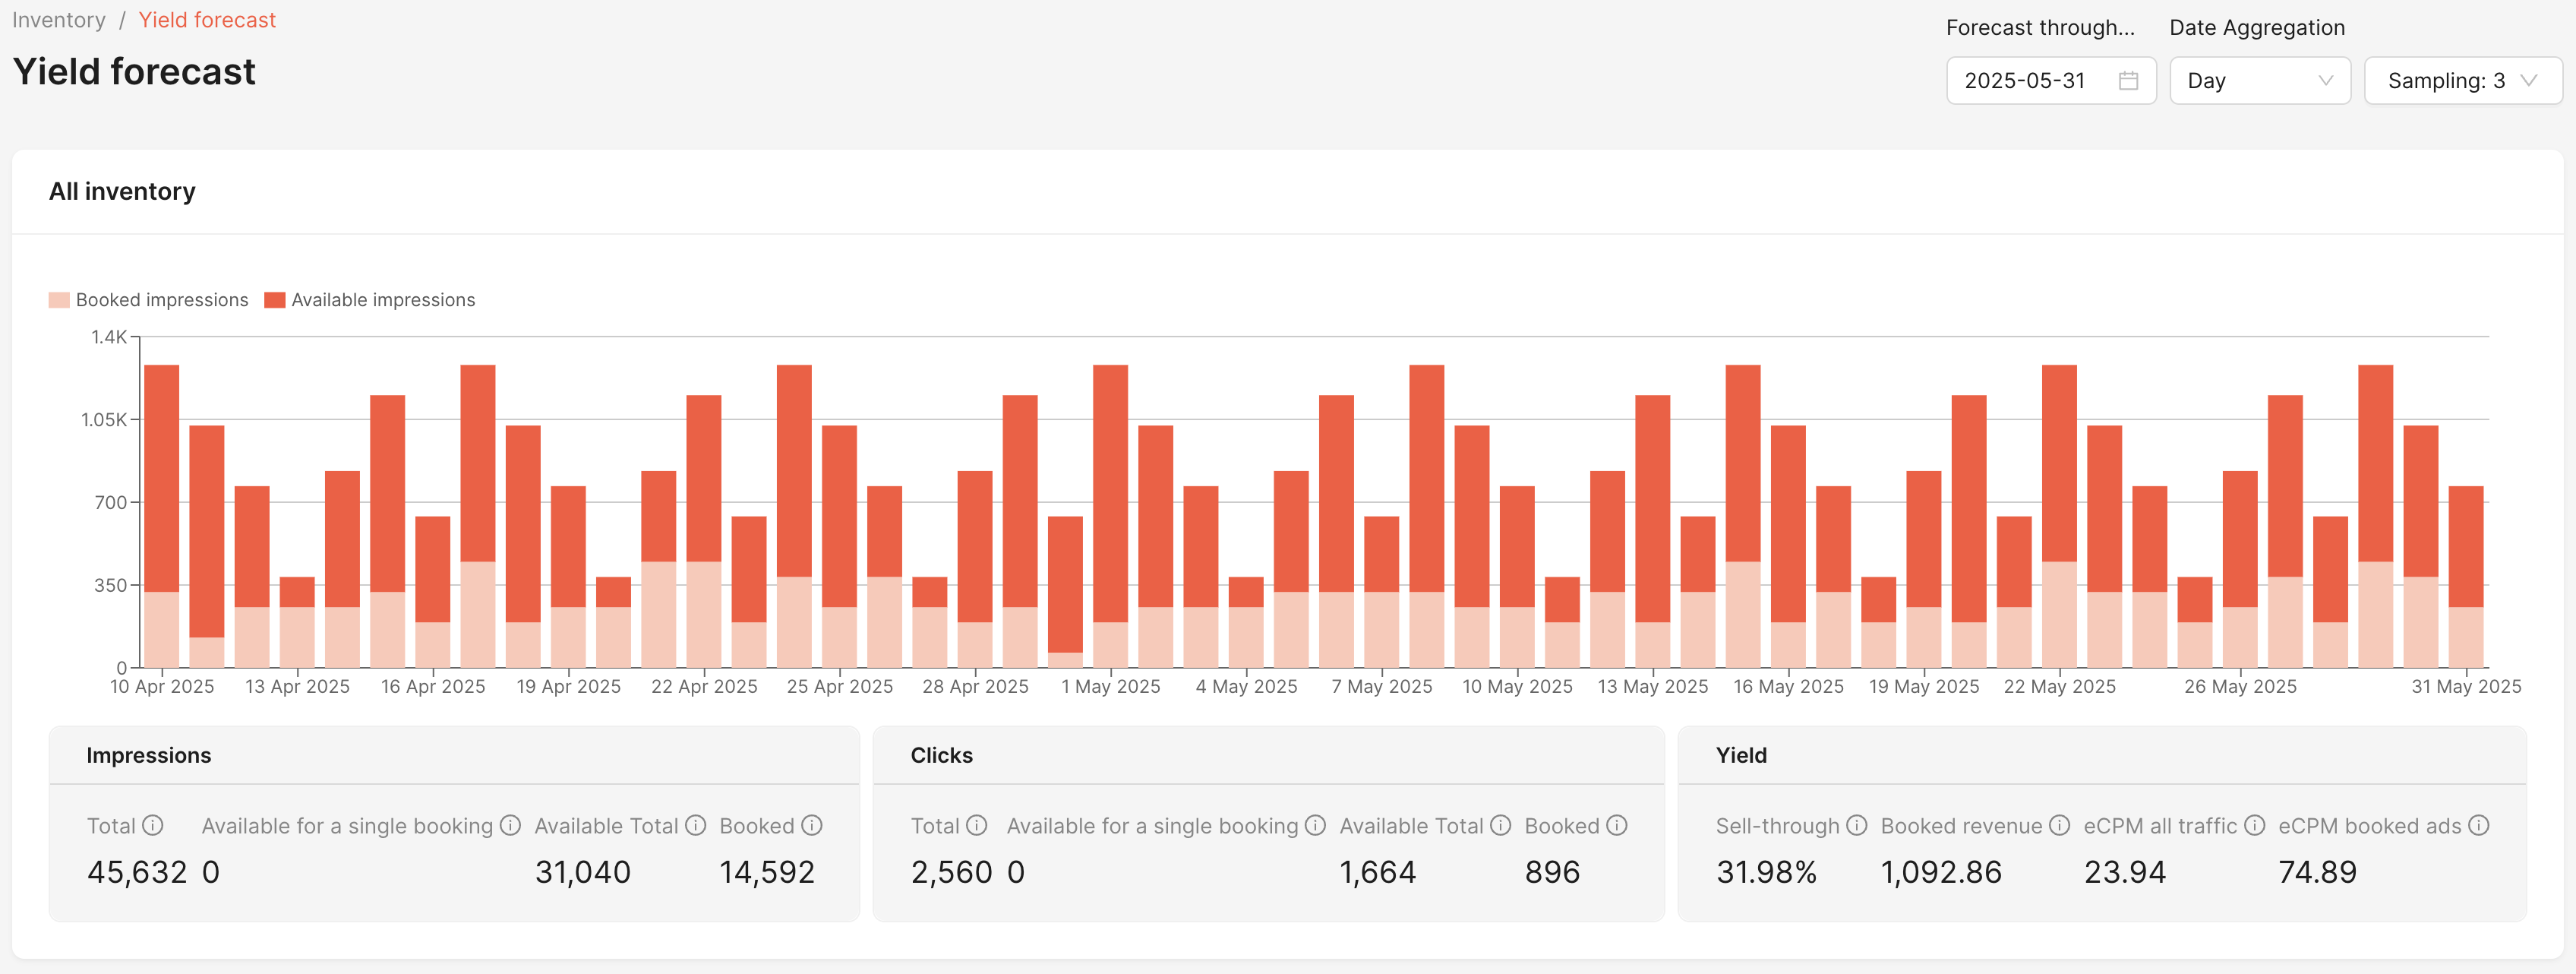
Yield forecast - All inventory overview
The Yield forecast overview section lets you quickly and visually see your future inventory and how it breaks down between sold and free per time period.
The default time period is per day. With the settings at the top left, you can view inventory breakdown by week or month, or adjust the overall time window. You can also adjust the sample level used, allowing you to increase the quality of the forecast in exchange for waiting longer for results.
The yield forecast overview also provides a summary of KPIs for that future time period:
Impressions
- Total: All predicted impressions for the forecast time period
- Available: Total unsold impressions for this time period
- Booked: Impressions already sold for this time period
Clicks
- Total: The total number of clicks predicted to be generated from predicted impressions for the forecast time period
- Available: Potential total clicks during this time period on unsold inventory
- Booked: Predicted clicks during this time period on inventory already sold
Yield
- Sell-through: Percentage of impressions that are sold (booked) for this time period, calculated as impressions booked divided by total impressions
- Booked revenue: Total predicted monetary revenue from the booked impressions, as set in the Flight's fields (CPC, CPA, CPM)
- eCPM all traffic: Average predicted effective revenue per thousand impressions across all traffic for this time period
- eCPM booked ads: Average predicted effective revenue per thousand impressions of the sold (booked) impressions

Detailed booked vs available tooltip
Ad Product breakdown
Just below All inventory you'll find a list of all your active ad products, group by pre-configured dimensions, along with their forecasted metrics for impressions, clicks and yield.
Hover on any of the metrics to see their definition. Click the columns to sort by ascending or descending value. You can also use the buttons to hide or show columns, and to download the information in the table as a CSV.
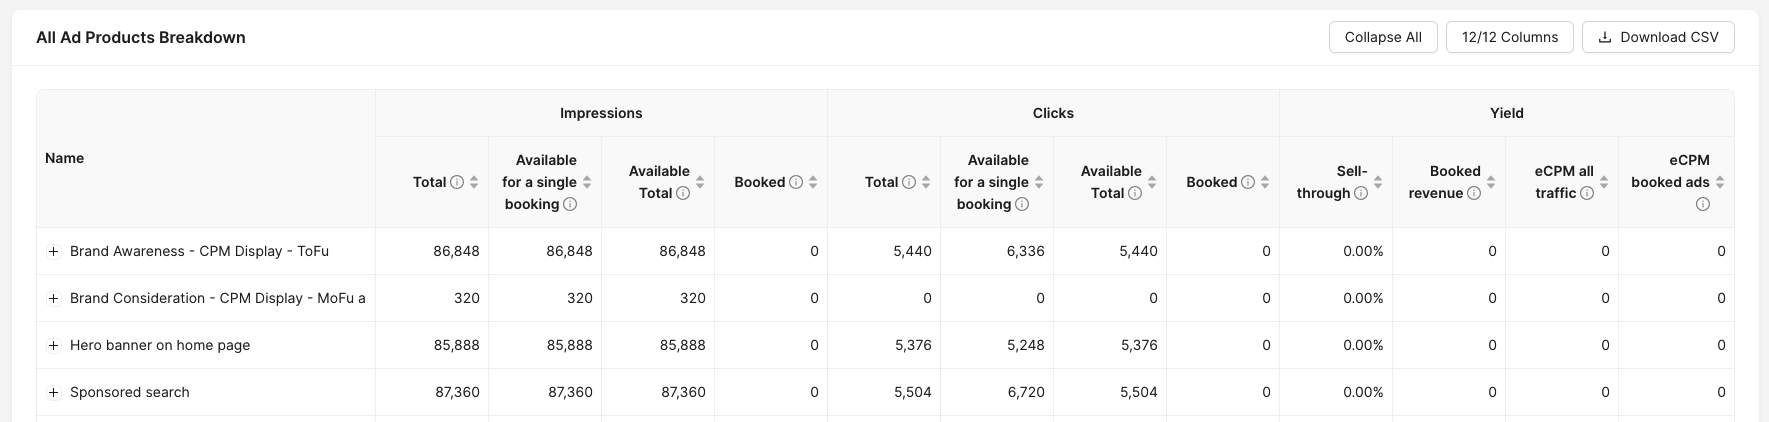
This table is useful to help you improve your overall yield by understanding key information such as:
- Discerning highest revenue areas
- Quickly understanding the average eCPM for your inventory
- Finding areas with the lowest sell-through
Forecast settings
In forecast settings, you can manage your ad products and overall settings that shape how yield forecast behaves and how ad products are broken down.
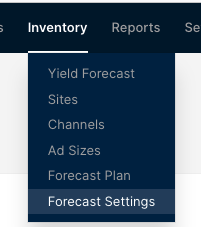
Navigate to forecast settings in Inventory > Forecast Settings.
Ad Product manager
The ad product manager is where you can list, create, update and delete Ad Products and select which ones will be visible for everyone in your team in the Yield forecast overview.
An ad product typically represents one of these two purposes:
- Business-driven products, packages, or bundles that your sales team or self-serve interface show to your advertisers. Common examples include: Hero banner on home page, sponsored search results, premium takeover, sponsored brand units on product category pages, in-app video unit, and audience targeted checkout recommended product.
- Inventory views, or divisions, that your business wants to see forecast metrics for. Common examples include:
- By medium, e.g.: web, in-app, in-store
- By business unit, e.g. retail, marketplace (for retailers with a marketplace business line)
- By ad type, e.g.: search, display, video
- By region/market, e.g.: EU, US, UK
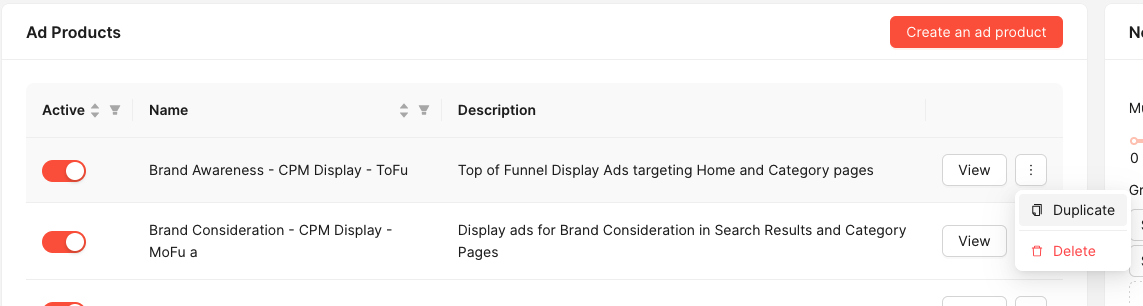
When you first open the forecast settings you start by seeing the list of ad products already defined:
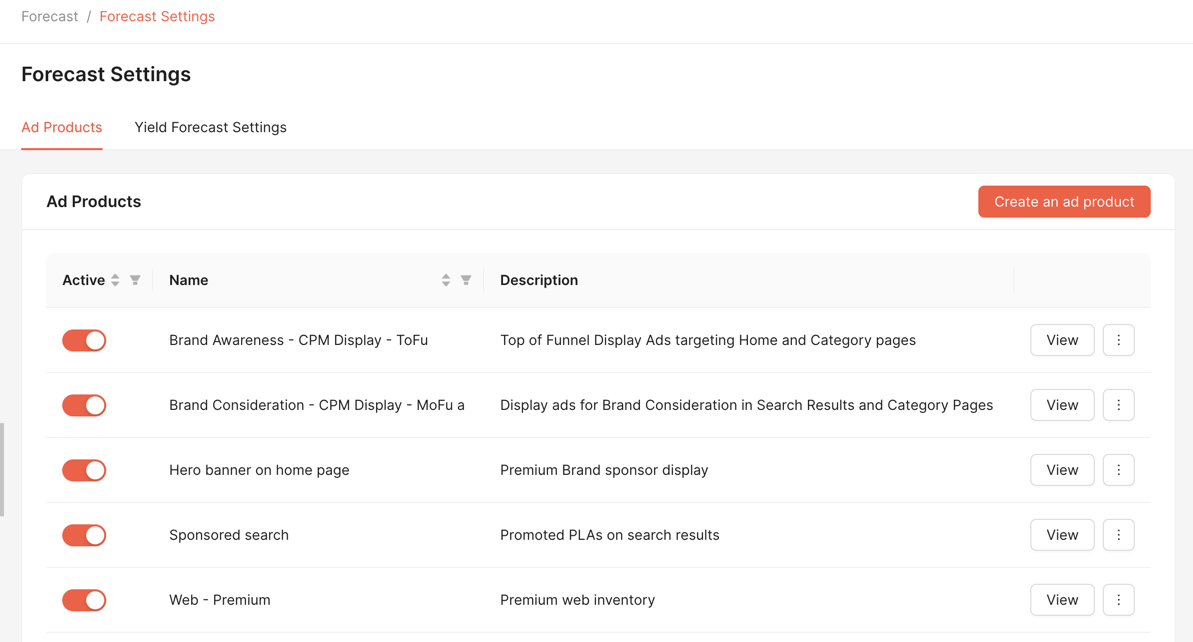
Activating an ad product makes it visible for everyone who uses the yield forecast. You can also edit any existing ad product or create a new one.
Creating a new ad product
There are two ways to create a new ad product:
- Duplicate and edit an existing ad product: Click the 3 dot menu for the ad product you wish to copy, then click "Duplicate." Your new ad product will appear in your list of ad products and can be edited.
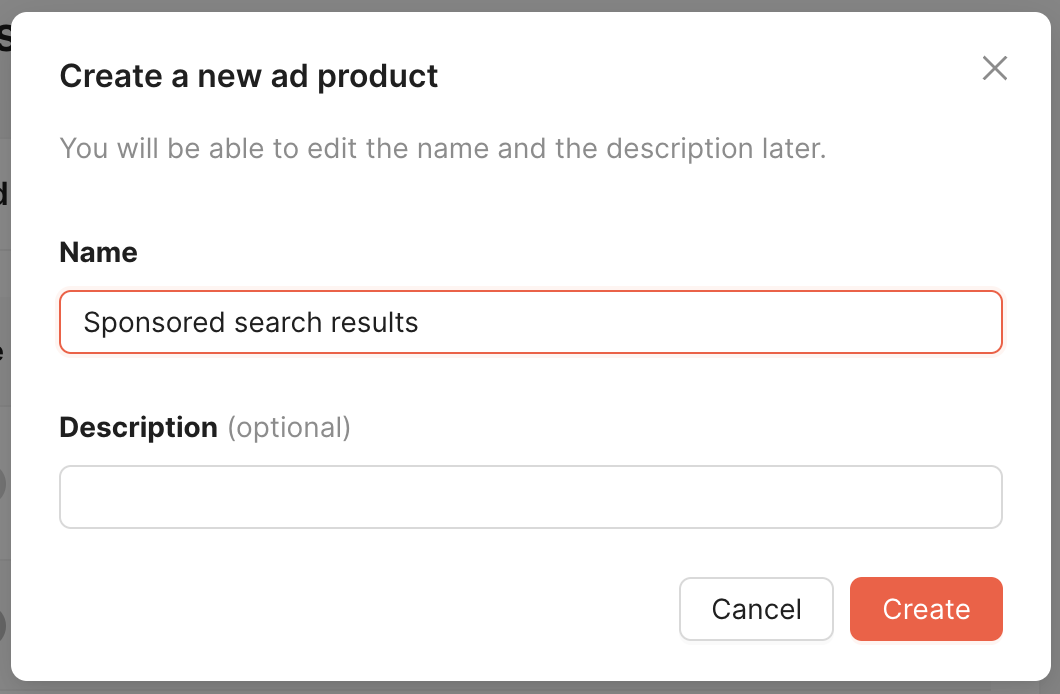
- Create a new ad product: Click "Create an ad product."
After creating a new ad product, you'll be asked for a name. This will be visible as part of the listing on the Yield forecast overview once the ad product is active. You can also provide an optional description.
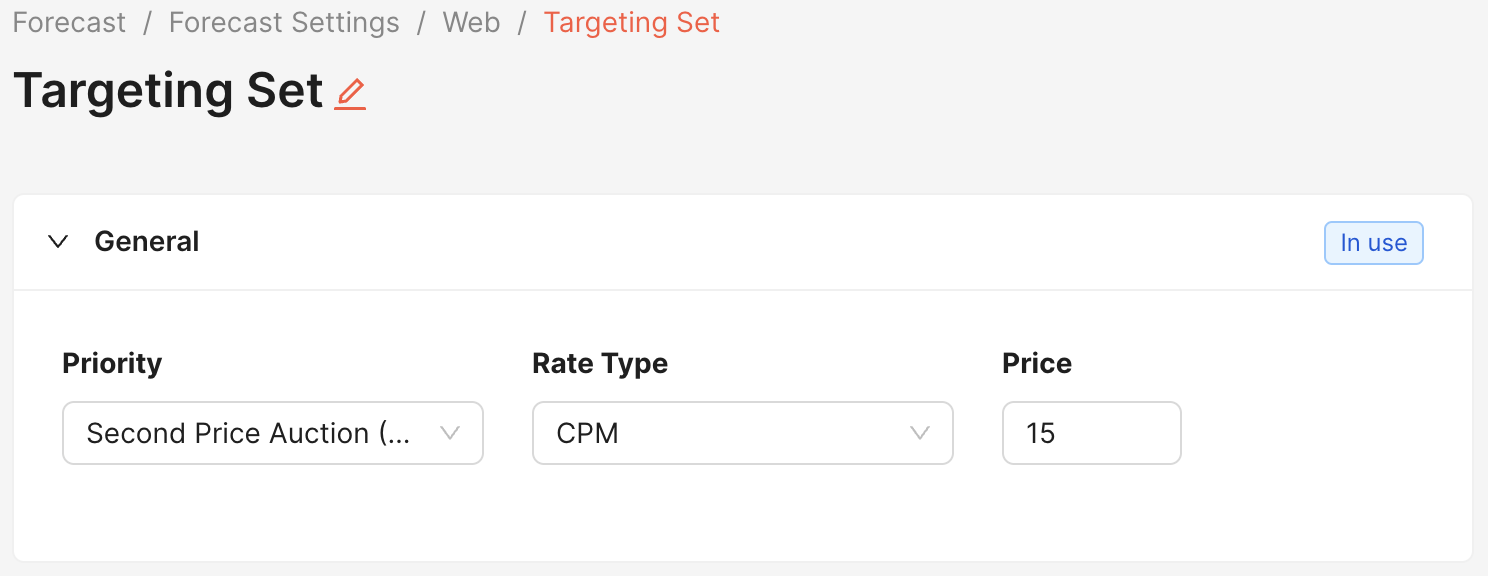
You'll then be immediately sent to edit the first targeting set for that ad product. An ad product can have one or more targeting sets, each one representing a different set of price and priority. If an ad product has a single price and priority, its likely you'll only need one targeting set. Targeting sets are akin to flights in the Kevel campaign structure.
You'll start by setting the priority, rate type, and price for the targeting set. For business ad products, these should correspond to how booked campaigns run. For inventory views – e.g. "Web" – the priority should be set at your lowest, so that you can see all campaigns running at any priority as booked, exception being if you want to see by "Web - premium" in which case you would select your premium priority. Rate type and price influence the split between booked and available when used alongside auction-style priorities.
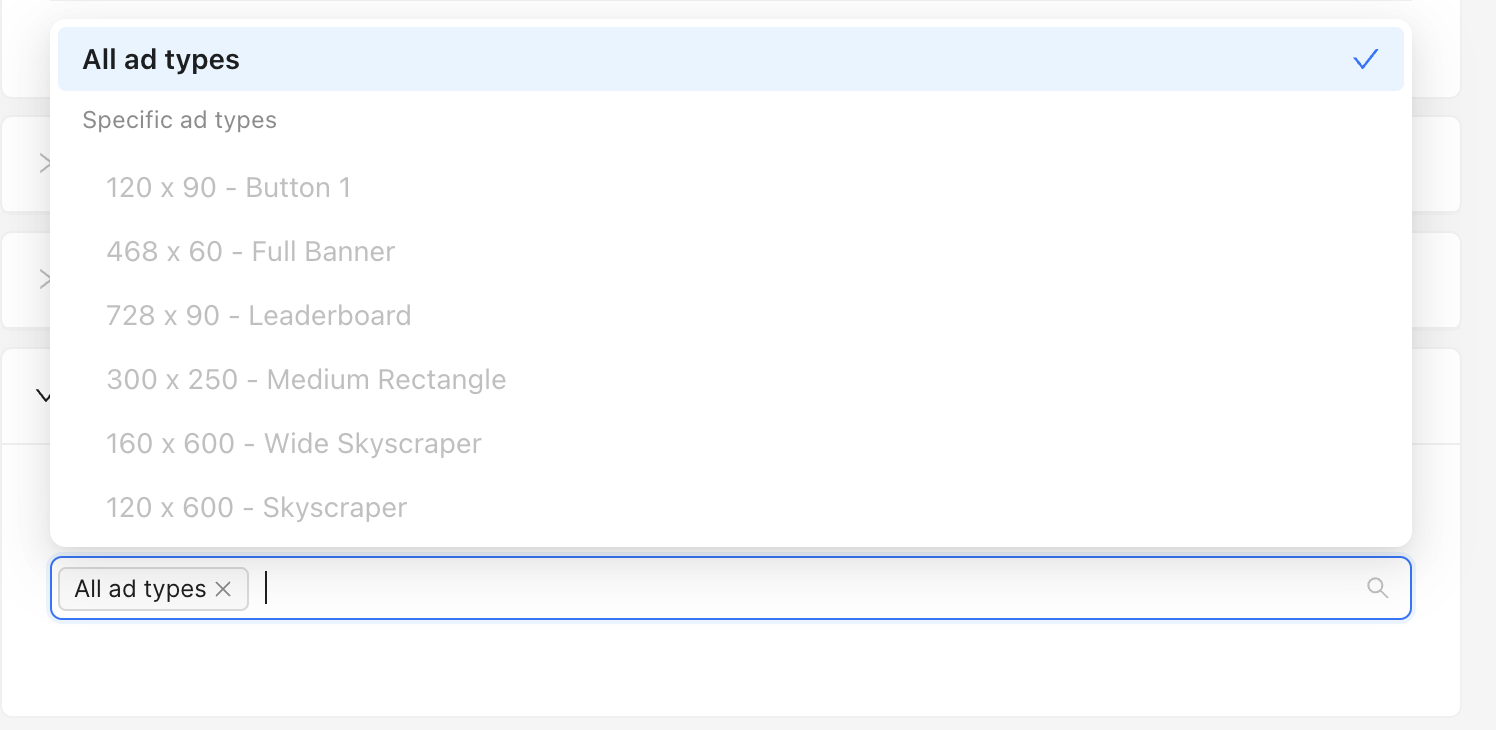
Afterwards you'll fill in all targeting criteria that applies to the ad product, in the same way you would for a Kevel flight, with the difference that there are no ads. Instead, you define which ad types are allowed to run as part of the targeting set. This effectively enables you to have a forecast for multiple ad types.
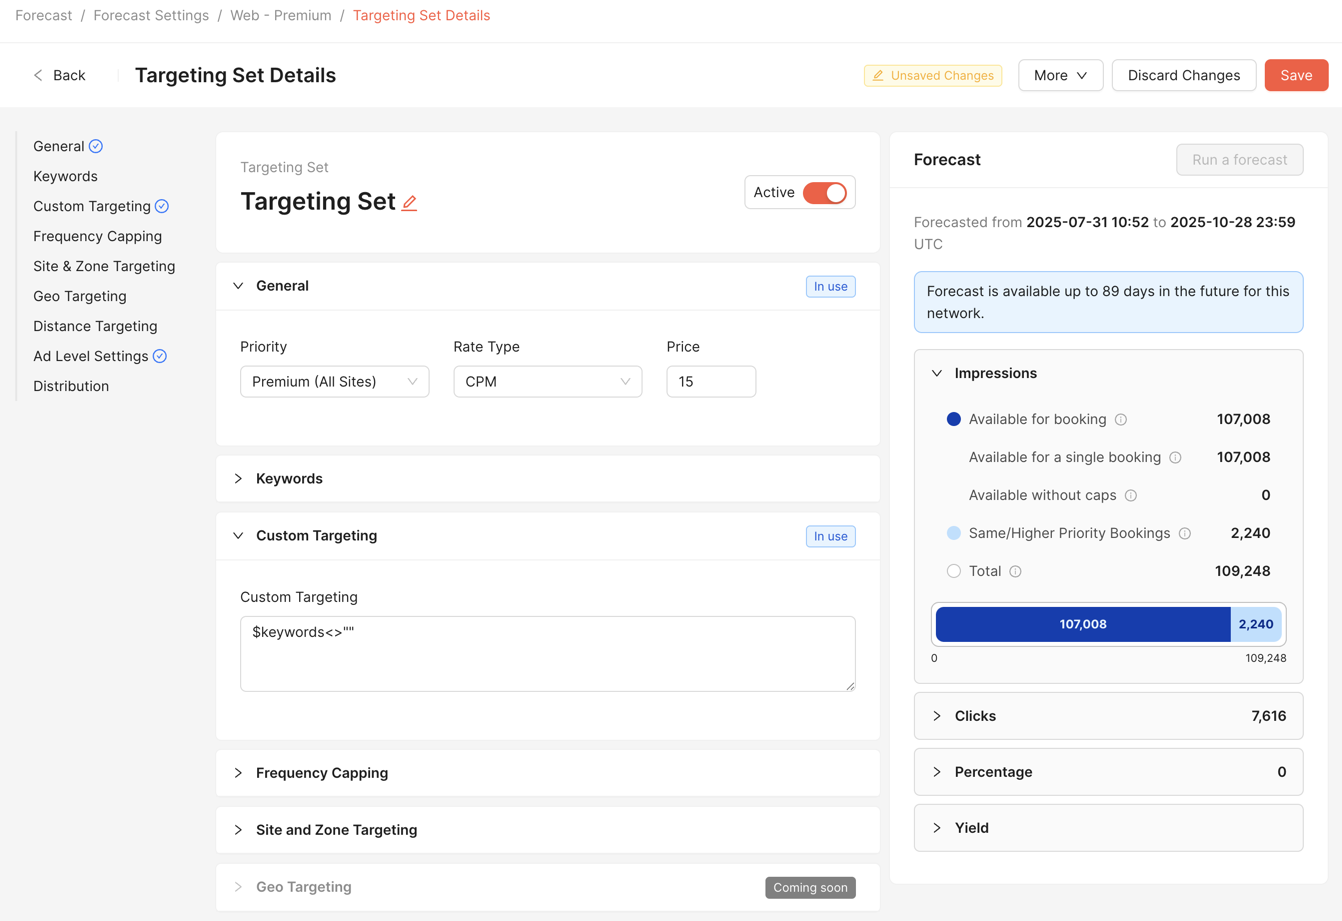
By default, all ad types are selected, but you can restrict to a subset.
You can at any stage of the targeting set building process press the Run a forecast button to produce an estimate of the reach this Targeting Set has. Every time you make a change to the targeting settings, you can re-forecast to get a new picture of the volume involved. The following information is available in the Targeting Set as well as the Ad Product Forecast widget:
- For Impressions, Clicks, Percentage (of traffic):
- Available for booking: Total unsold inventory that matches the ad product
- Available for a single booking: The amount a single campaign can deliver
- Available without caps: Opportunities that could deliver but will be restricted by capping at either/or flight and user frequency. All deliveries restricted by the following settings will be added to this metric:
- Flight Distribution Rules (DuplicateModes/NoDuplicate)
- Advertiser placement limits
- Ad Caps
- Frequency Caps
- Same/Higher Priority Bookings: Inventory matching the ad product that is already sold (not necessarily sold as this ad product)
- Total: Complete total matched inventory
- For Yield:
- Sell-through: Percentage of impressions that are sold (booked)
- Booked revenue: Total monetary revenue from the booked impressions
- eCPM all traffic: Average effective revenue per thousand impressions across all matched traffic
- eCPM booked ads: Average effective revenue per thousand impressions of the sold (booked) impressions
Once saved, you'll get back to the list of targeting sets for the ad product, and you'll be able to navigate back to the list of ad products, where you can choose which to make active in the yield forecast overview:

You can again click on Run a forecast to get an estimate of inventory available and booked for the Ad Product as a whole.
Yield Forecast settings
Next to the ad product manager, you'll find a list of Yield Forecast settings that apply to the network:
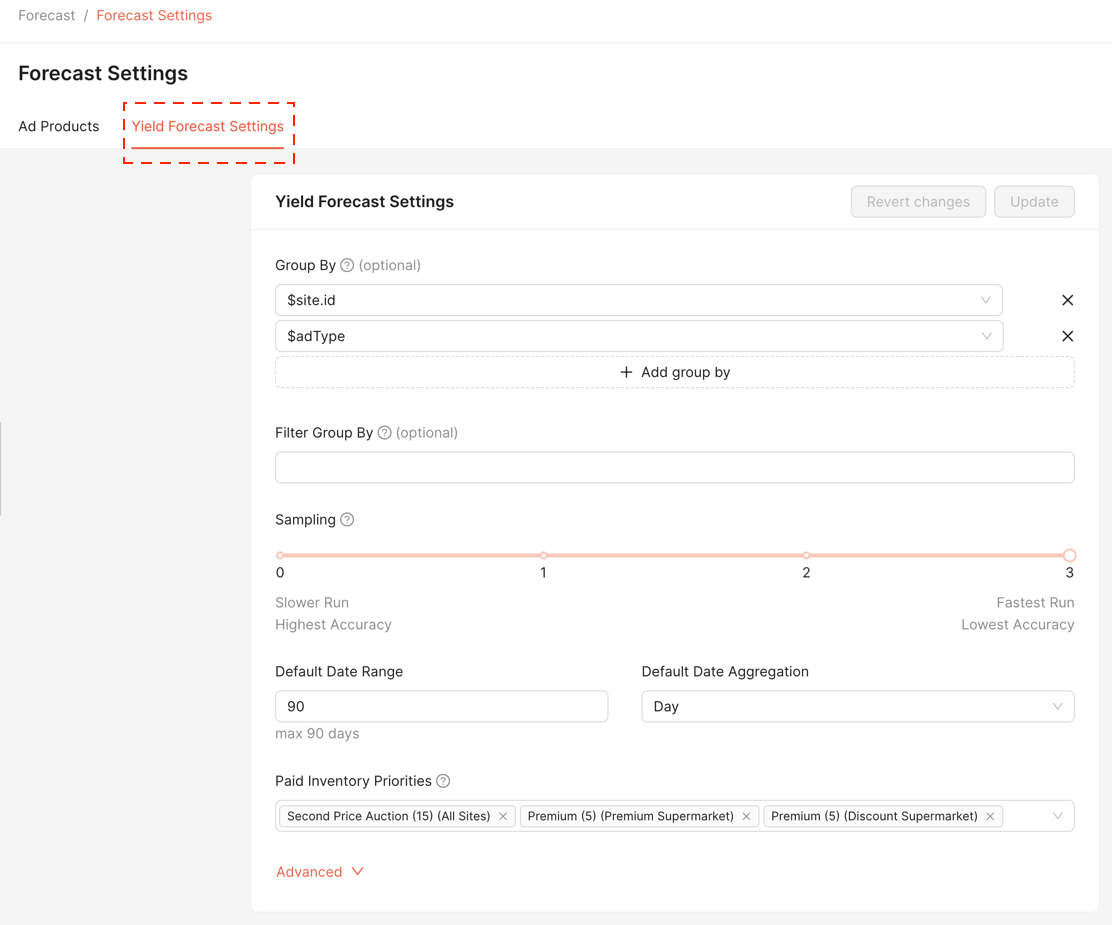
Group by: lets you choose the dimensions by which to display each of the ad products as in the yield forecast overview. Typically these would be dimensions such as site ID, zone, and/or ad type, but you can choose your own and in which order to have them.
Filter Group by: lets you decide which rows in the group by results you want to hide, by their resulting values. For example, you could elect to hide any results under 1000 impressions when grouping by $keyword using the expressions impressions >= 1000 in this field.
Sampling: Sets the default sample level used when opening the yield forecast overview. The quality of the forecast increases at the expense of results taking a little longer for the results to come through. The level of sampling varies between 0 and 3, with 3 providing the quickest response and 0 the highest accuracy. By default this is set to 3.
Default Date Range: The default look-ahead time span to show in the yield forecast overview.
Default Date Aggregation: The default aggregation to use in the yield forecast overview, choices are Day, Week and Month
Inventory Priorities: This is what lets you decide which priorities should be considered unsold, for example any house-level ad priority. Here you define which is the lowest of the paid priorities you have, for each of the channels you have in the network.
Advanced settings:

Updated 8 months ago