Statistics
What the statistics mean and why are they there
Campaign statistics
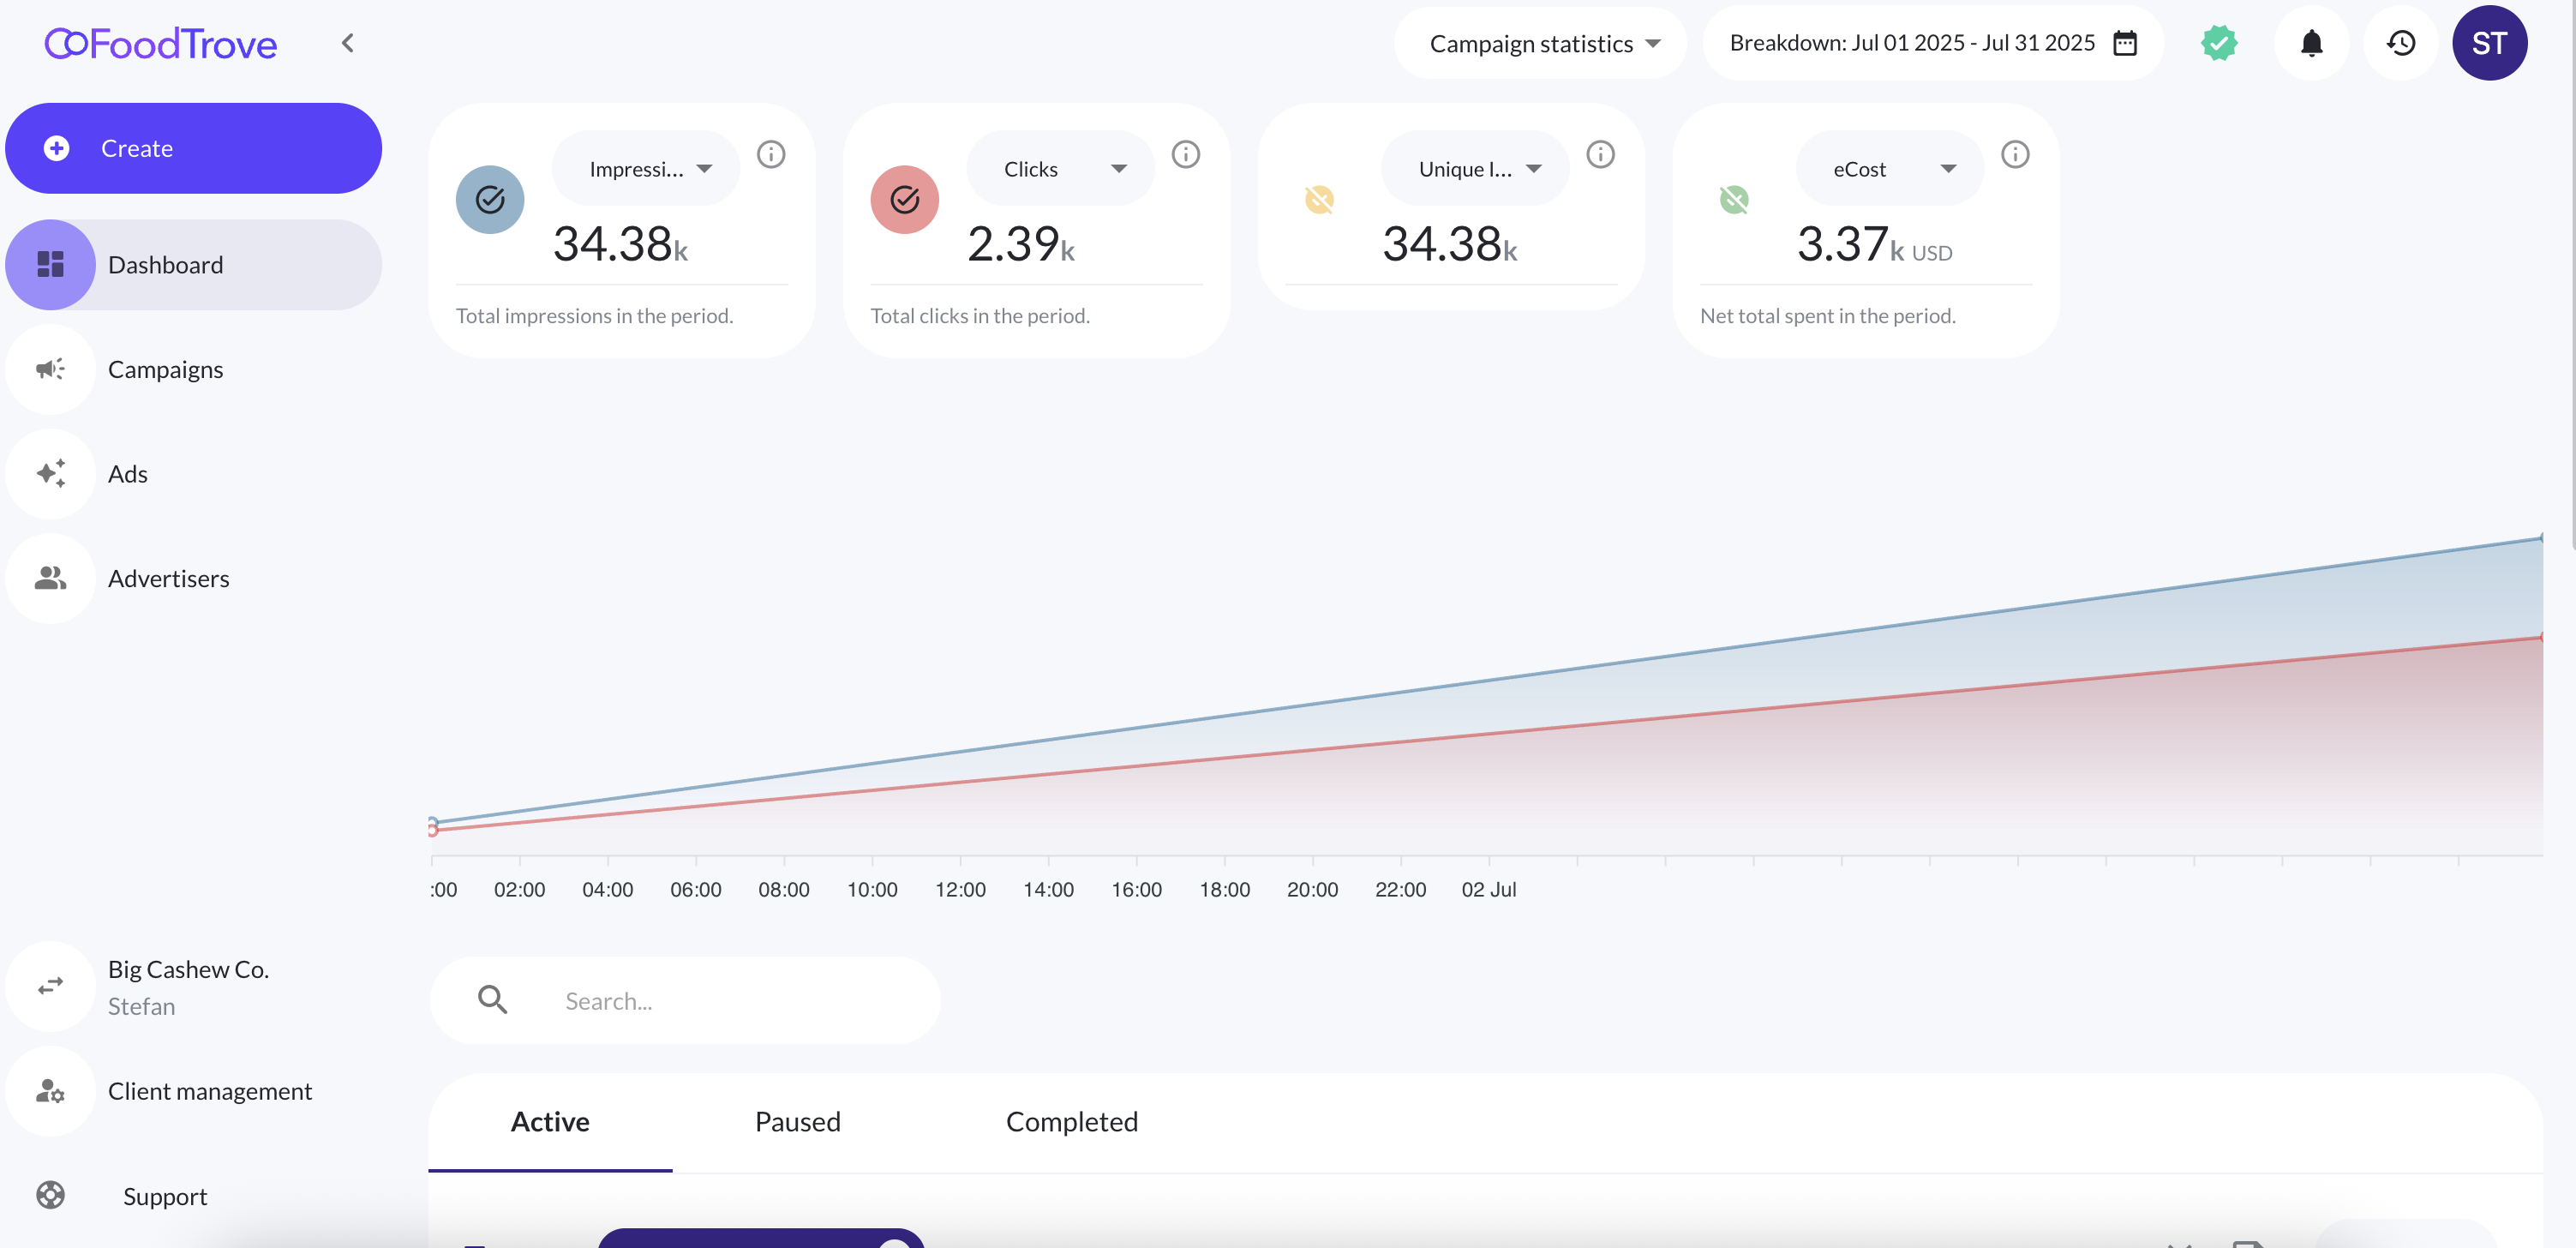
The first thing visible when opening the dashboard is the statistics view (if there are stats for the chosen period). There are widgets which show individual statistics for the client based on the metric chosen in the widget. Below the widgets there is a chart which displays the averages for the chosen statistics. The metrics which the chart shows can be toggled on/off by clicking the icon in the widgets. In the above image the chart shows the stats for Impressions and Clicks, but not for Unique Imp. and eCost. The colors on the chart correspond to the colors on the icons in the widgets, making it easy to distinguish between statistics just by looking at the chart.
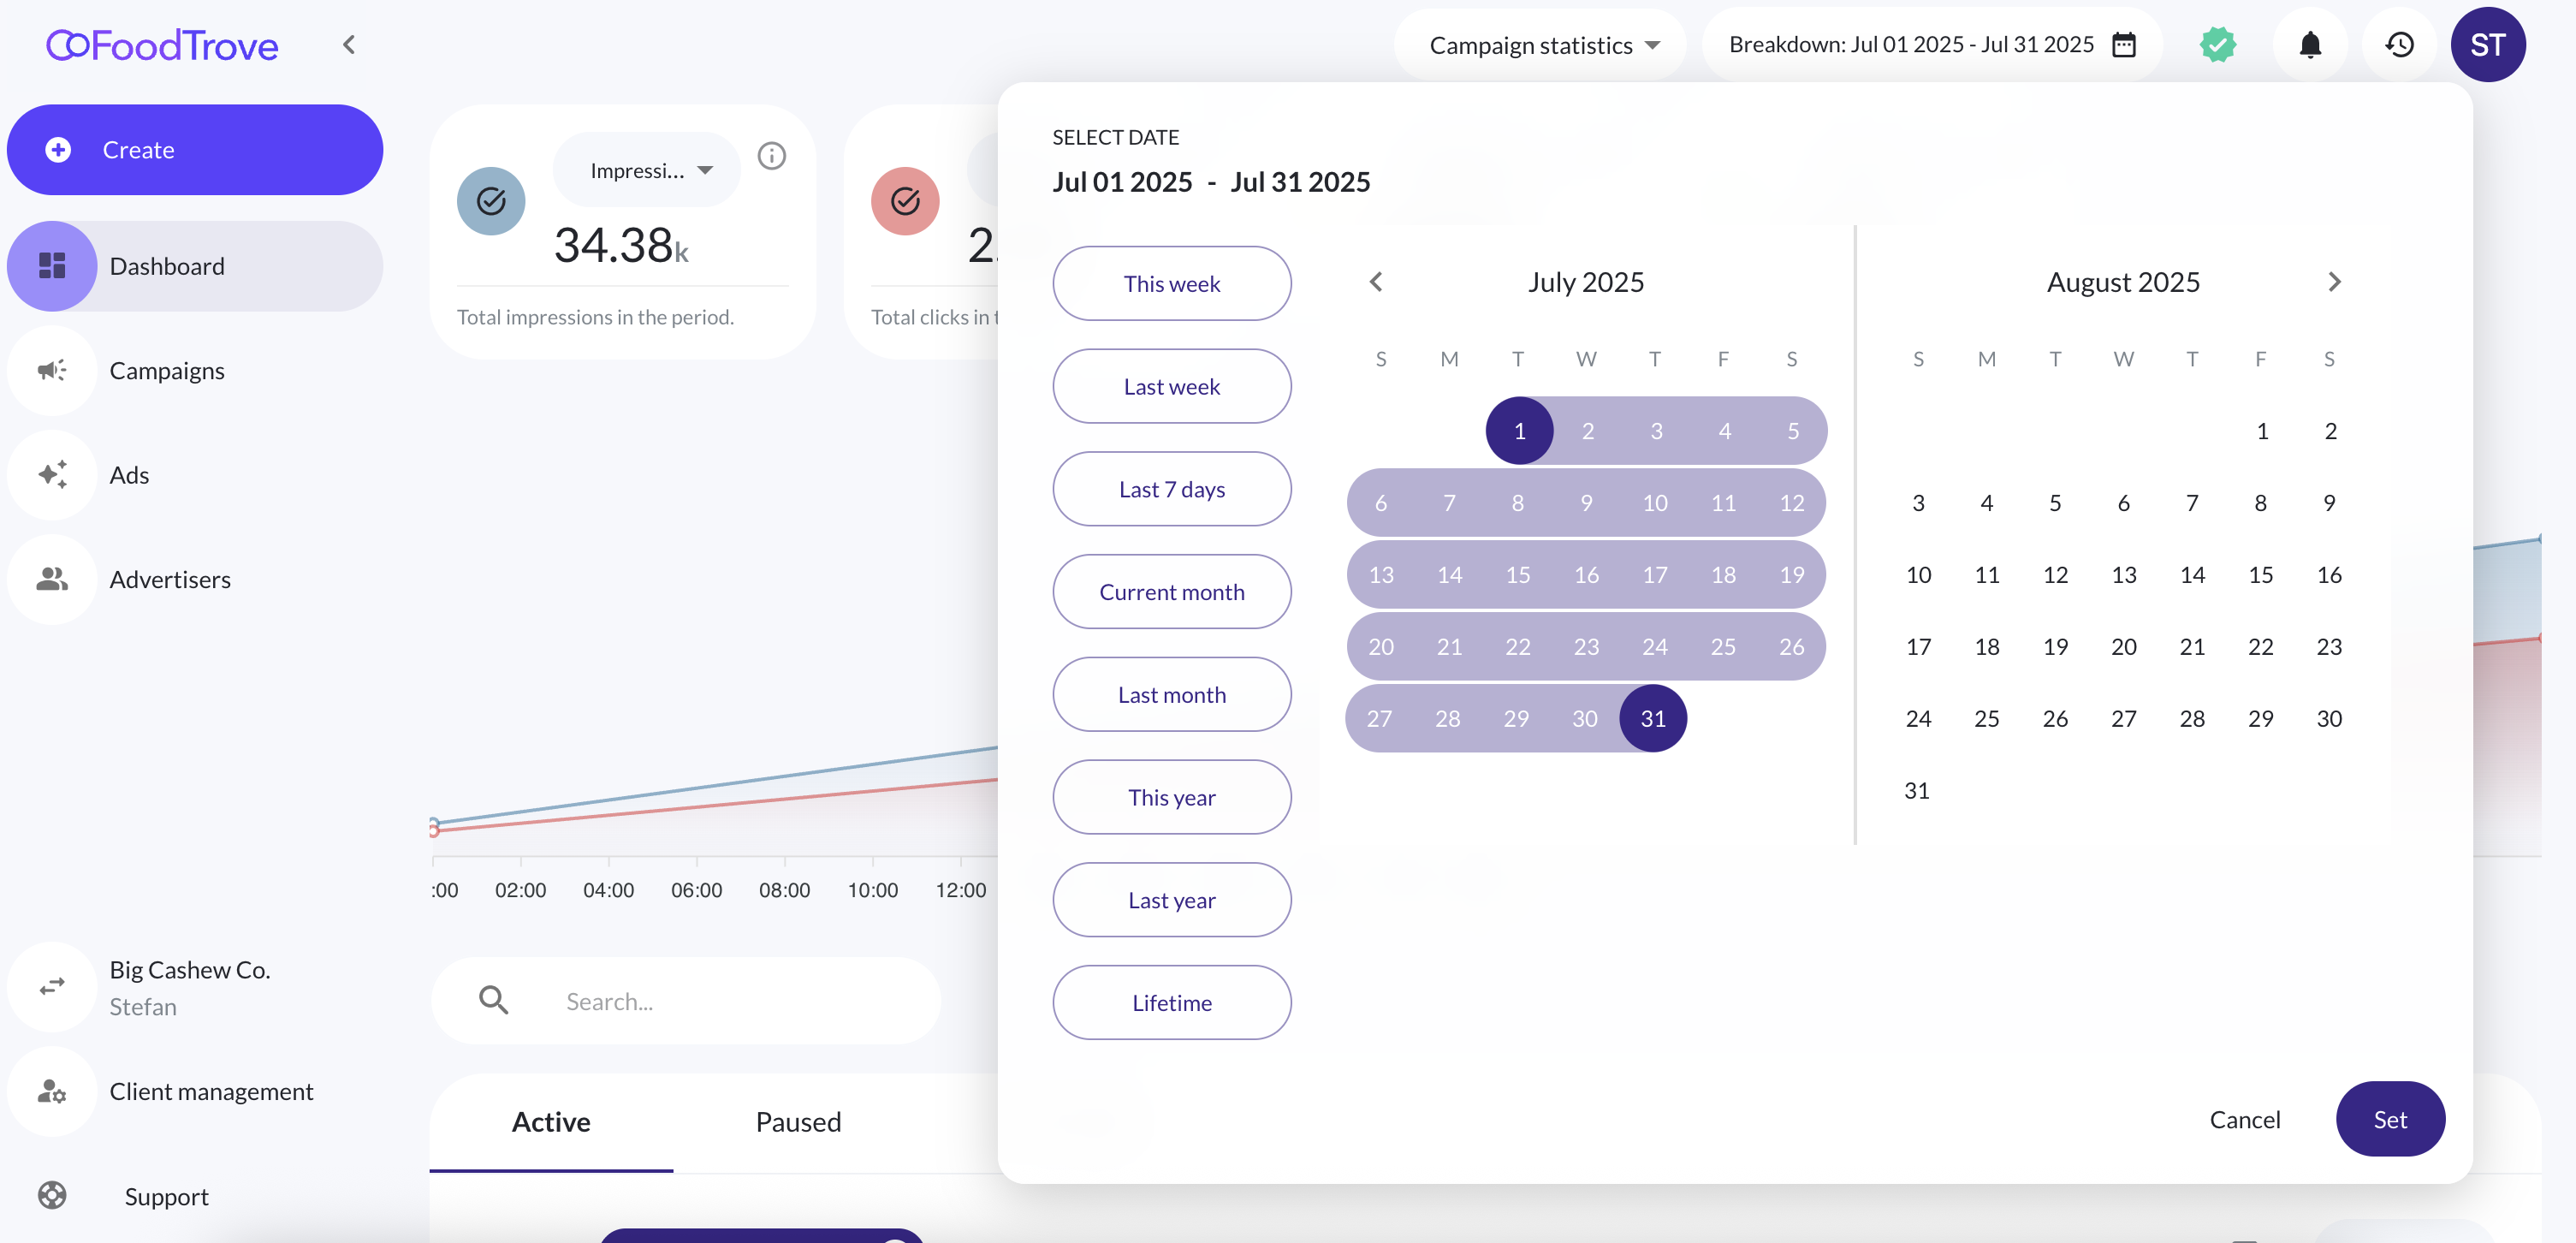
The period for which the statistics are shown can be changed in the top right corner, by clicking the "Breakdown" button. Clicking it opens up a popup (as seen in the image below) in which there is a date-picker, and different shortcuts for selecting a predefined time period. This date breakdown will affect both the campaign statistics, as well as the product statistics, which are explained in the next part.
Product statistics
Product statistics on the dashboard
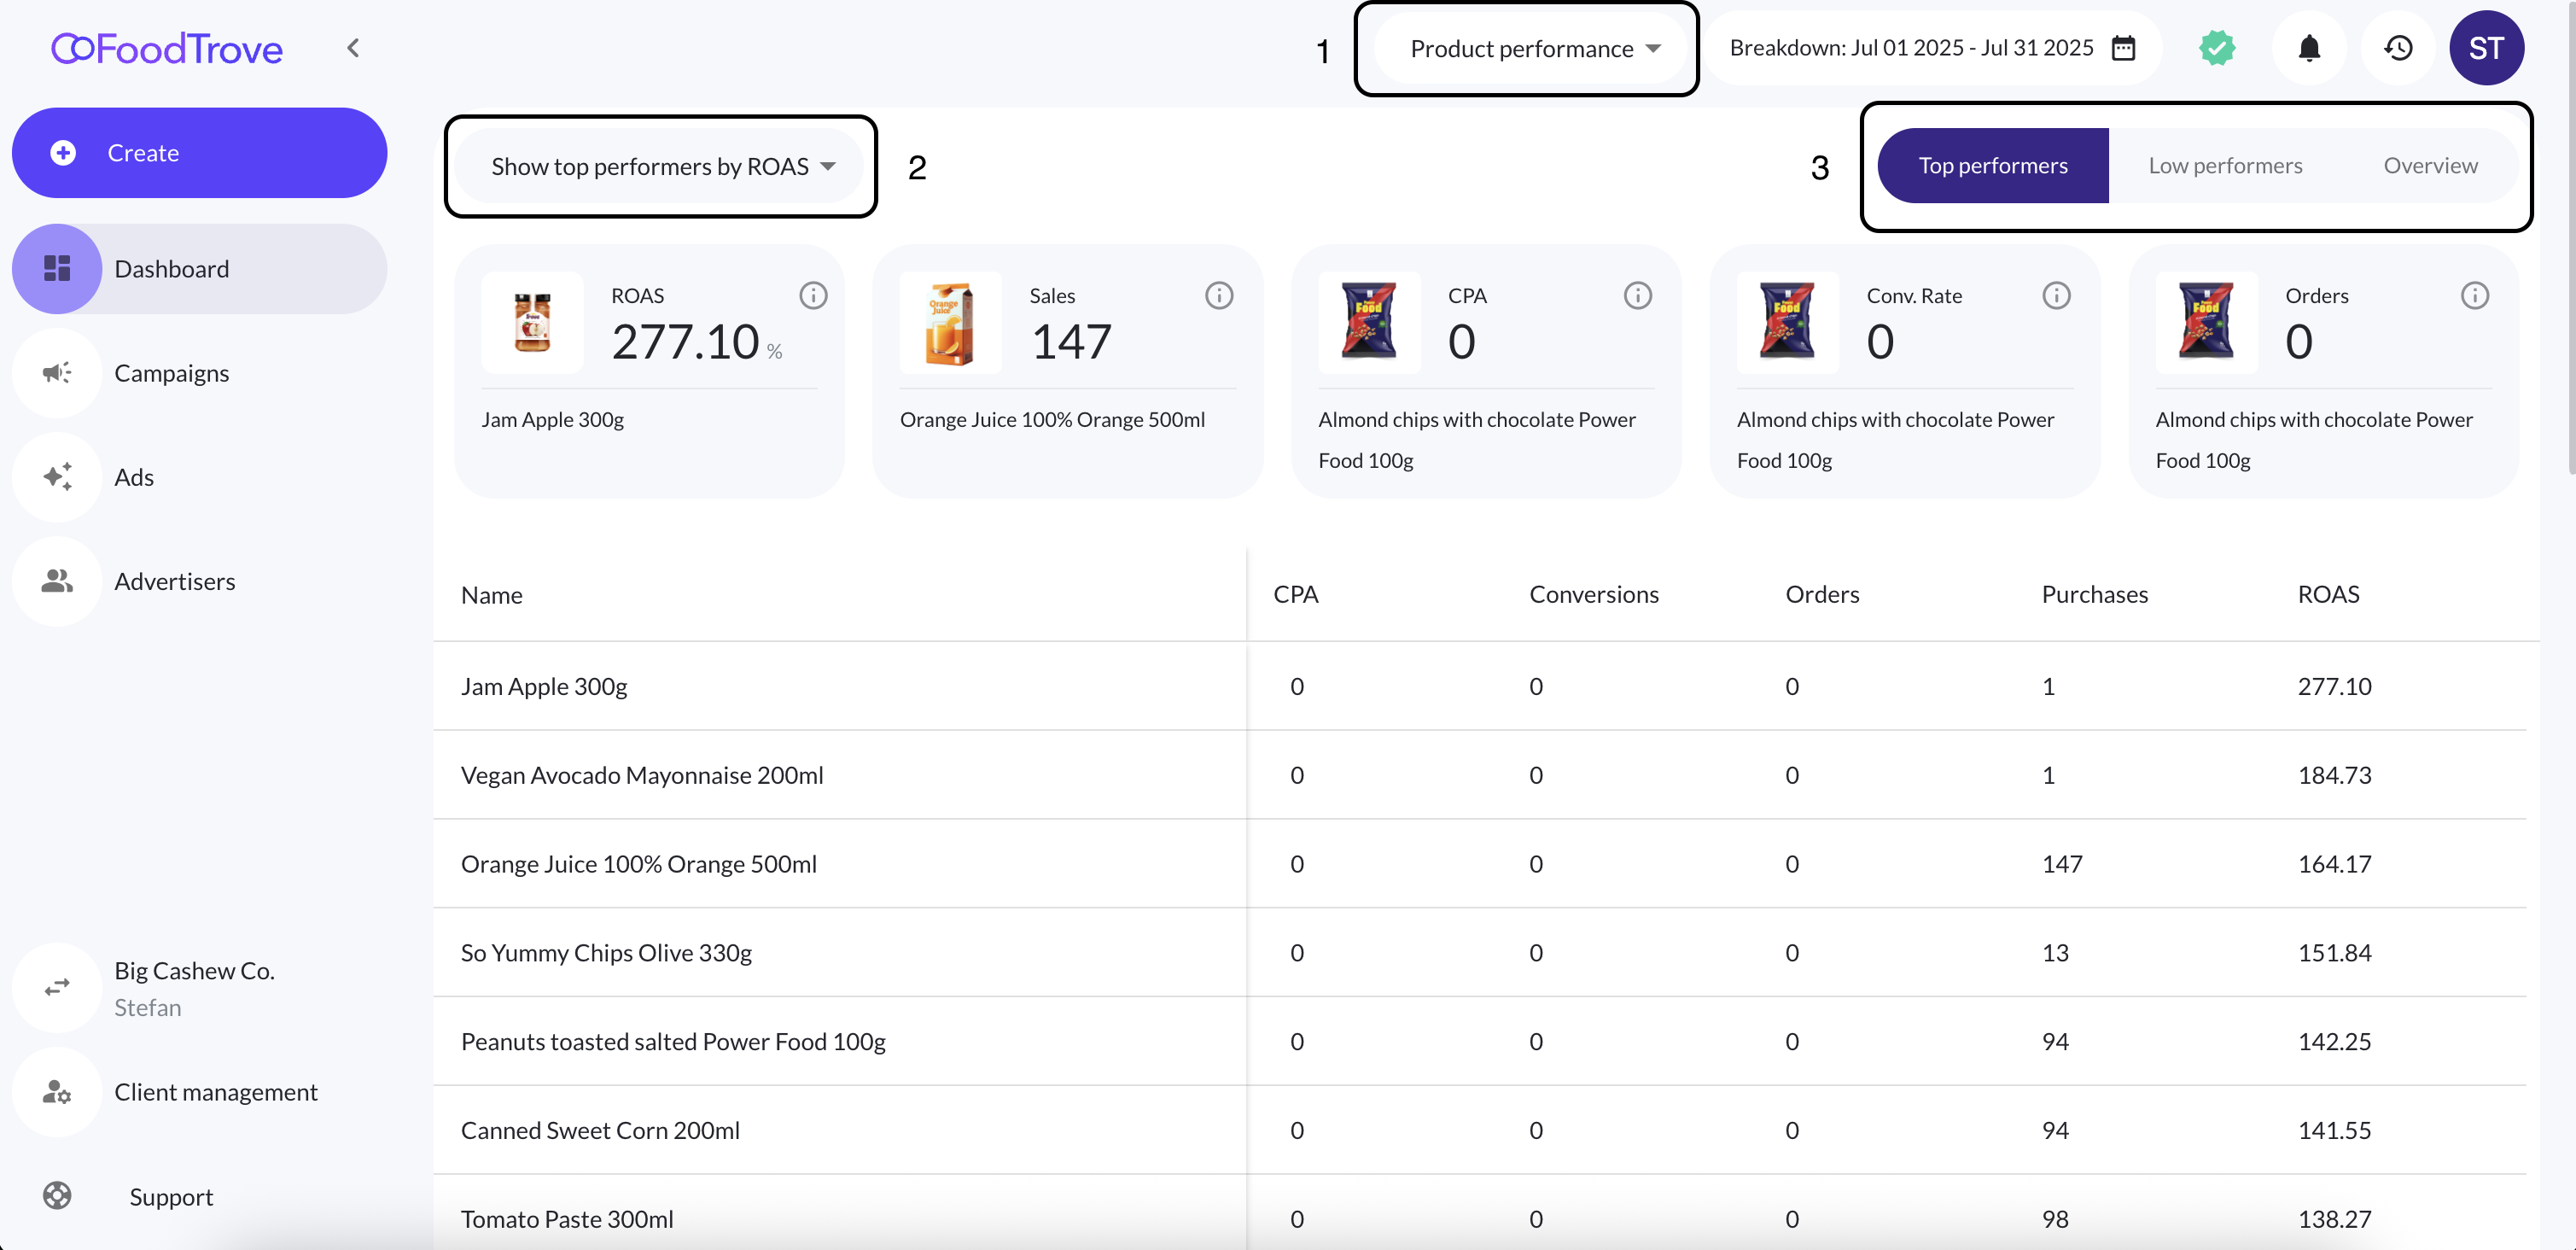
Selecting the "Product performance" option from the dropdown in the top of the page (rectangle #1 in the image above) toggles on the statistics for the products of the client. A box with an additional dropdown, toggle button group, widgets and a table is displayed.
The default options selected are the "Top performers" and the "ROAS" metric. With "Top performers" selected the widgets display the top performing products for the time period selected in the breakdown based on each metric, and the value of the metric. Hovering the info button shows a more detailed description of the metric being displayed.
The table below the widgets shows the 10 top performing products by the metric selected in the metrics dropdown (rectangle #2 in the image above). A different metric can be selected from the dropdown, which will update the table to show the 10 top performing products by that metric instead.
By toggling a different button from the button group on the right side of the screen (rectangle #3 in the image above), both the widgets and the table values will change. Selecting the "Low performers" option will show the lowest performing product by each metric in the widgets, and the 10 lowest performing products by a selected metric in the table. Selecting the "Overview" option will show the average of each metric for the time period in the widgets section, while it will show all the products and their stats in the table view.
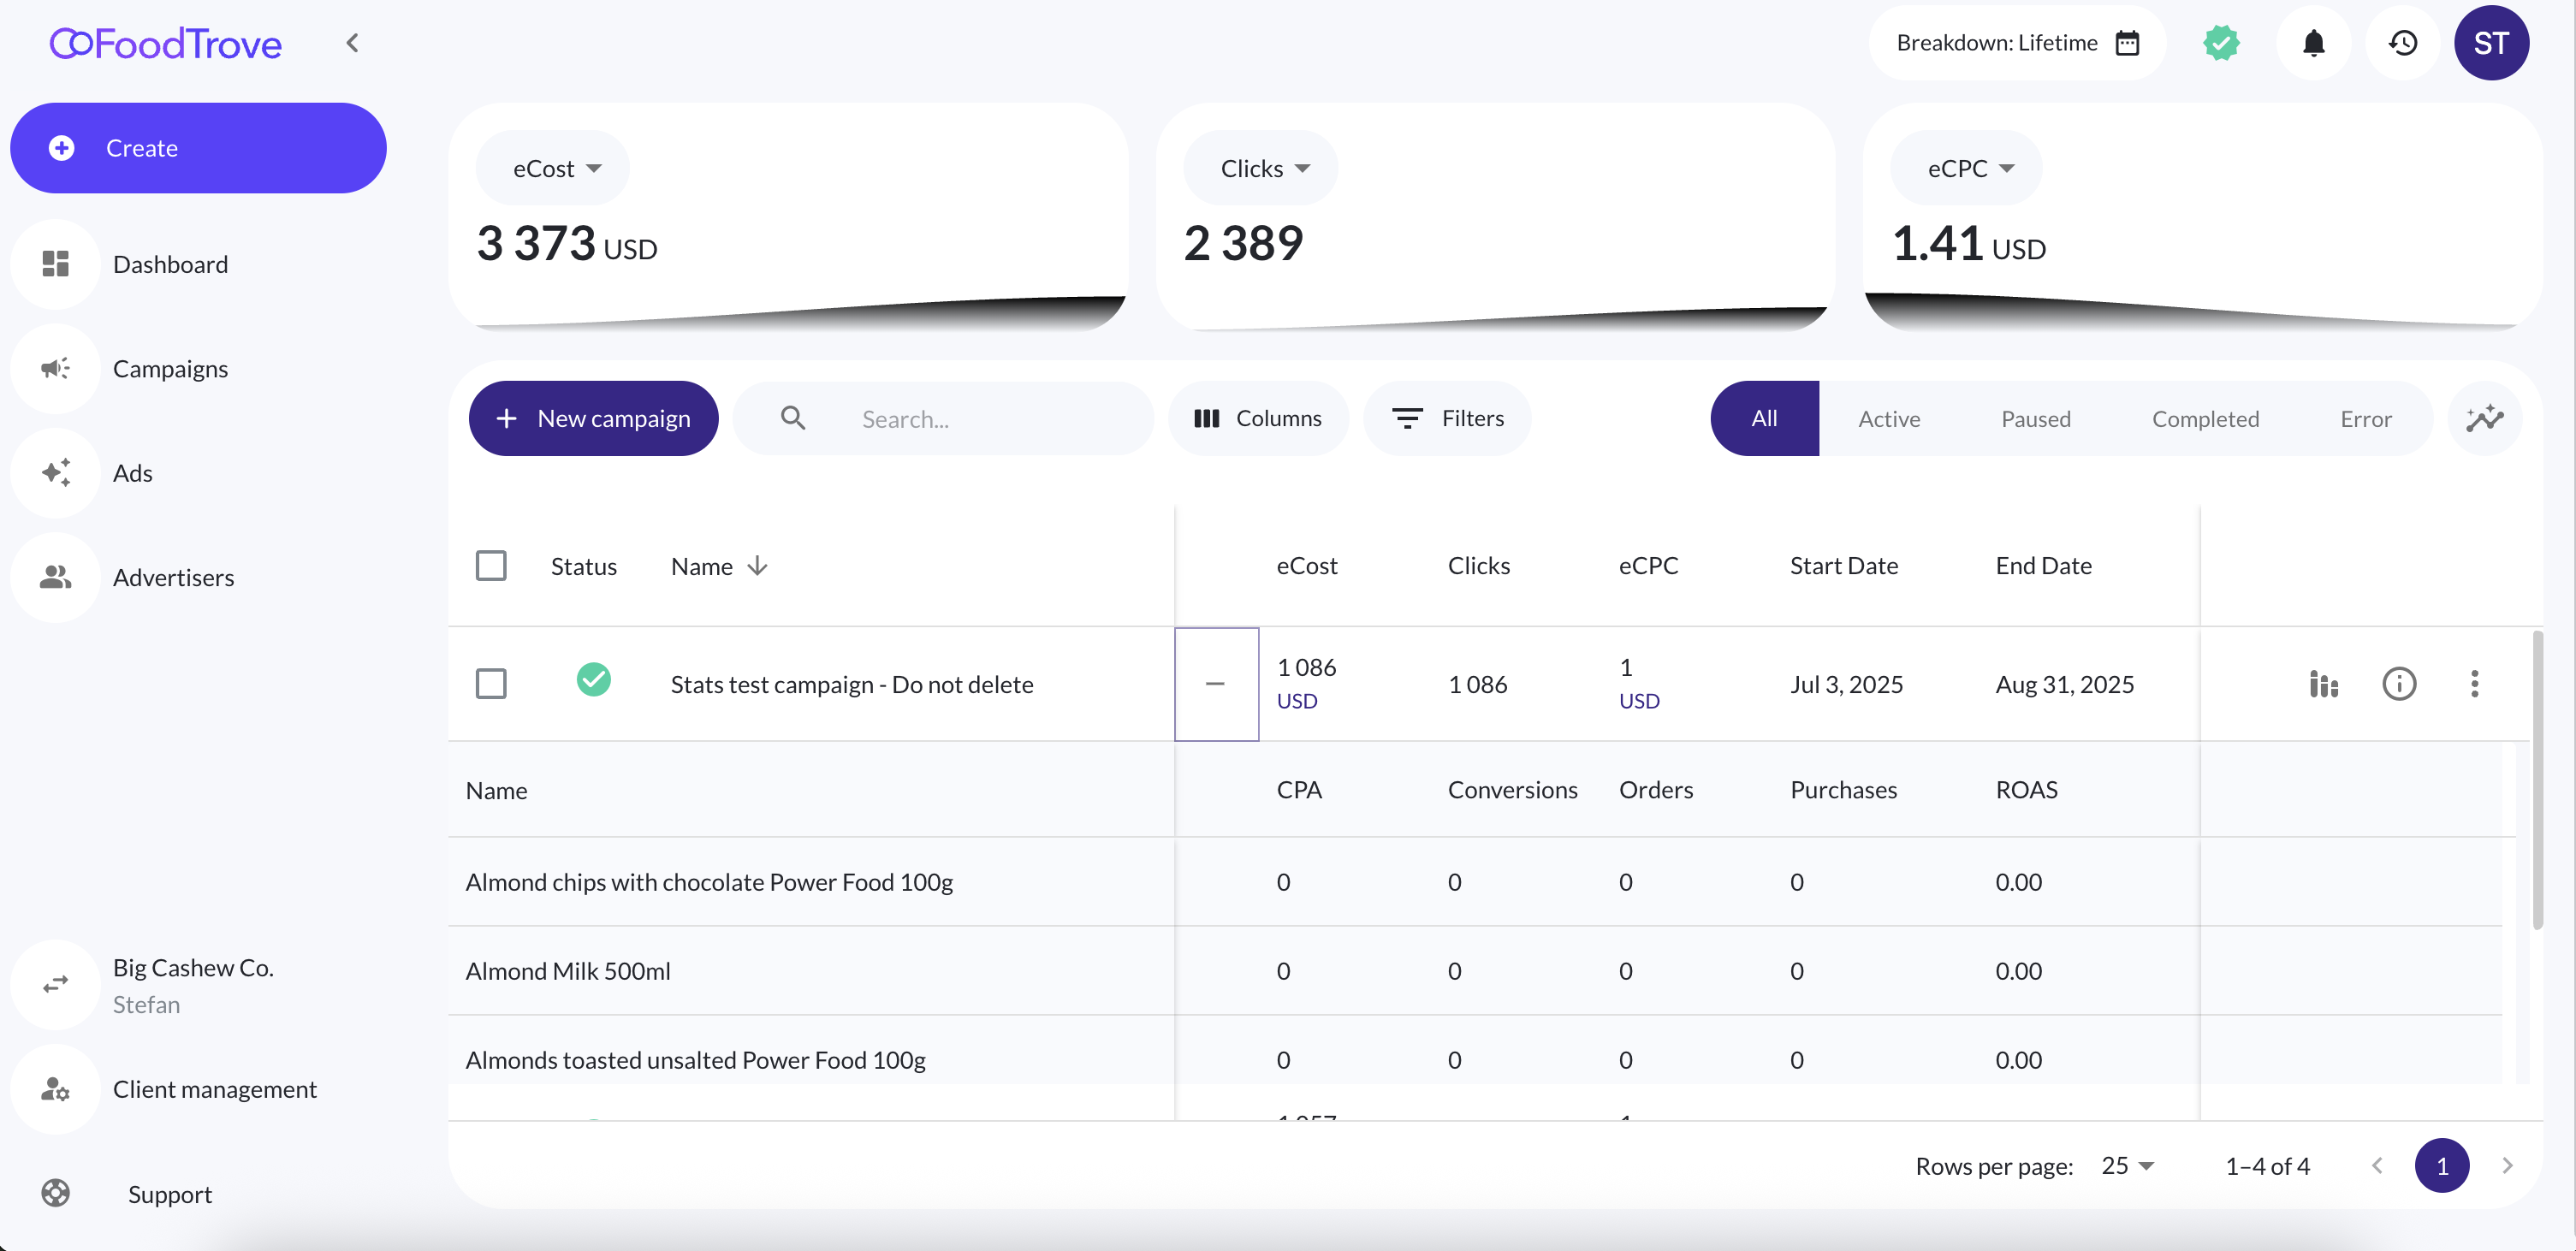
Product stats in the product campaigns list
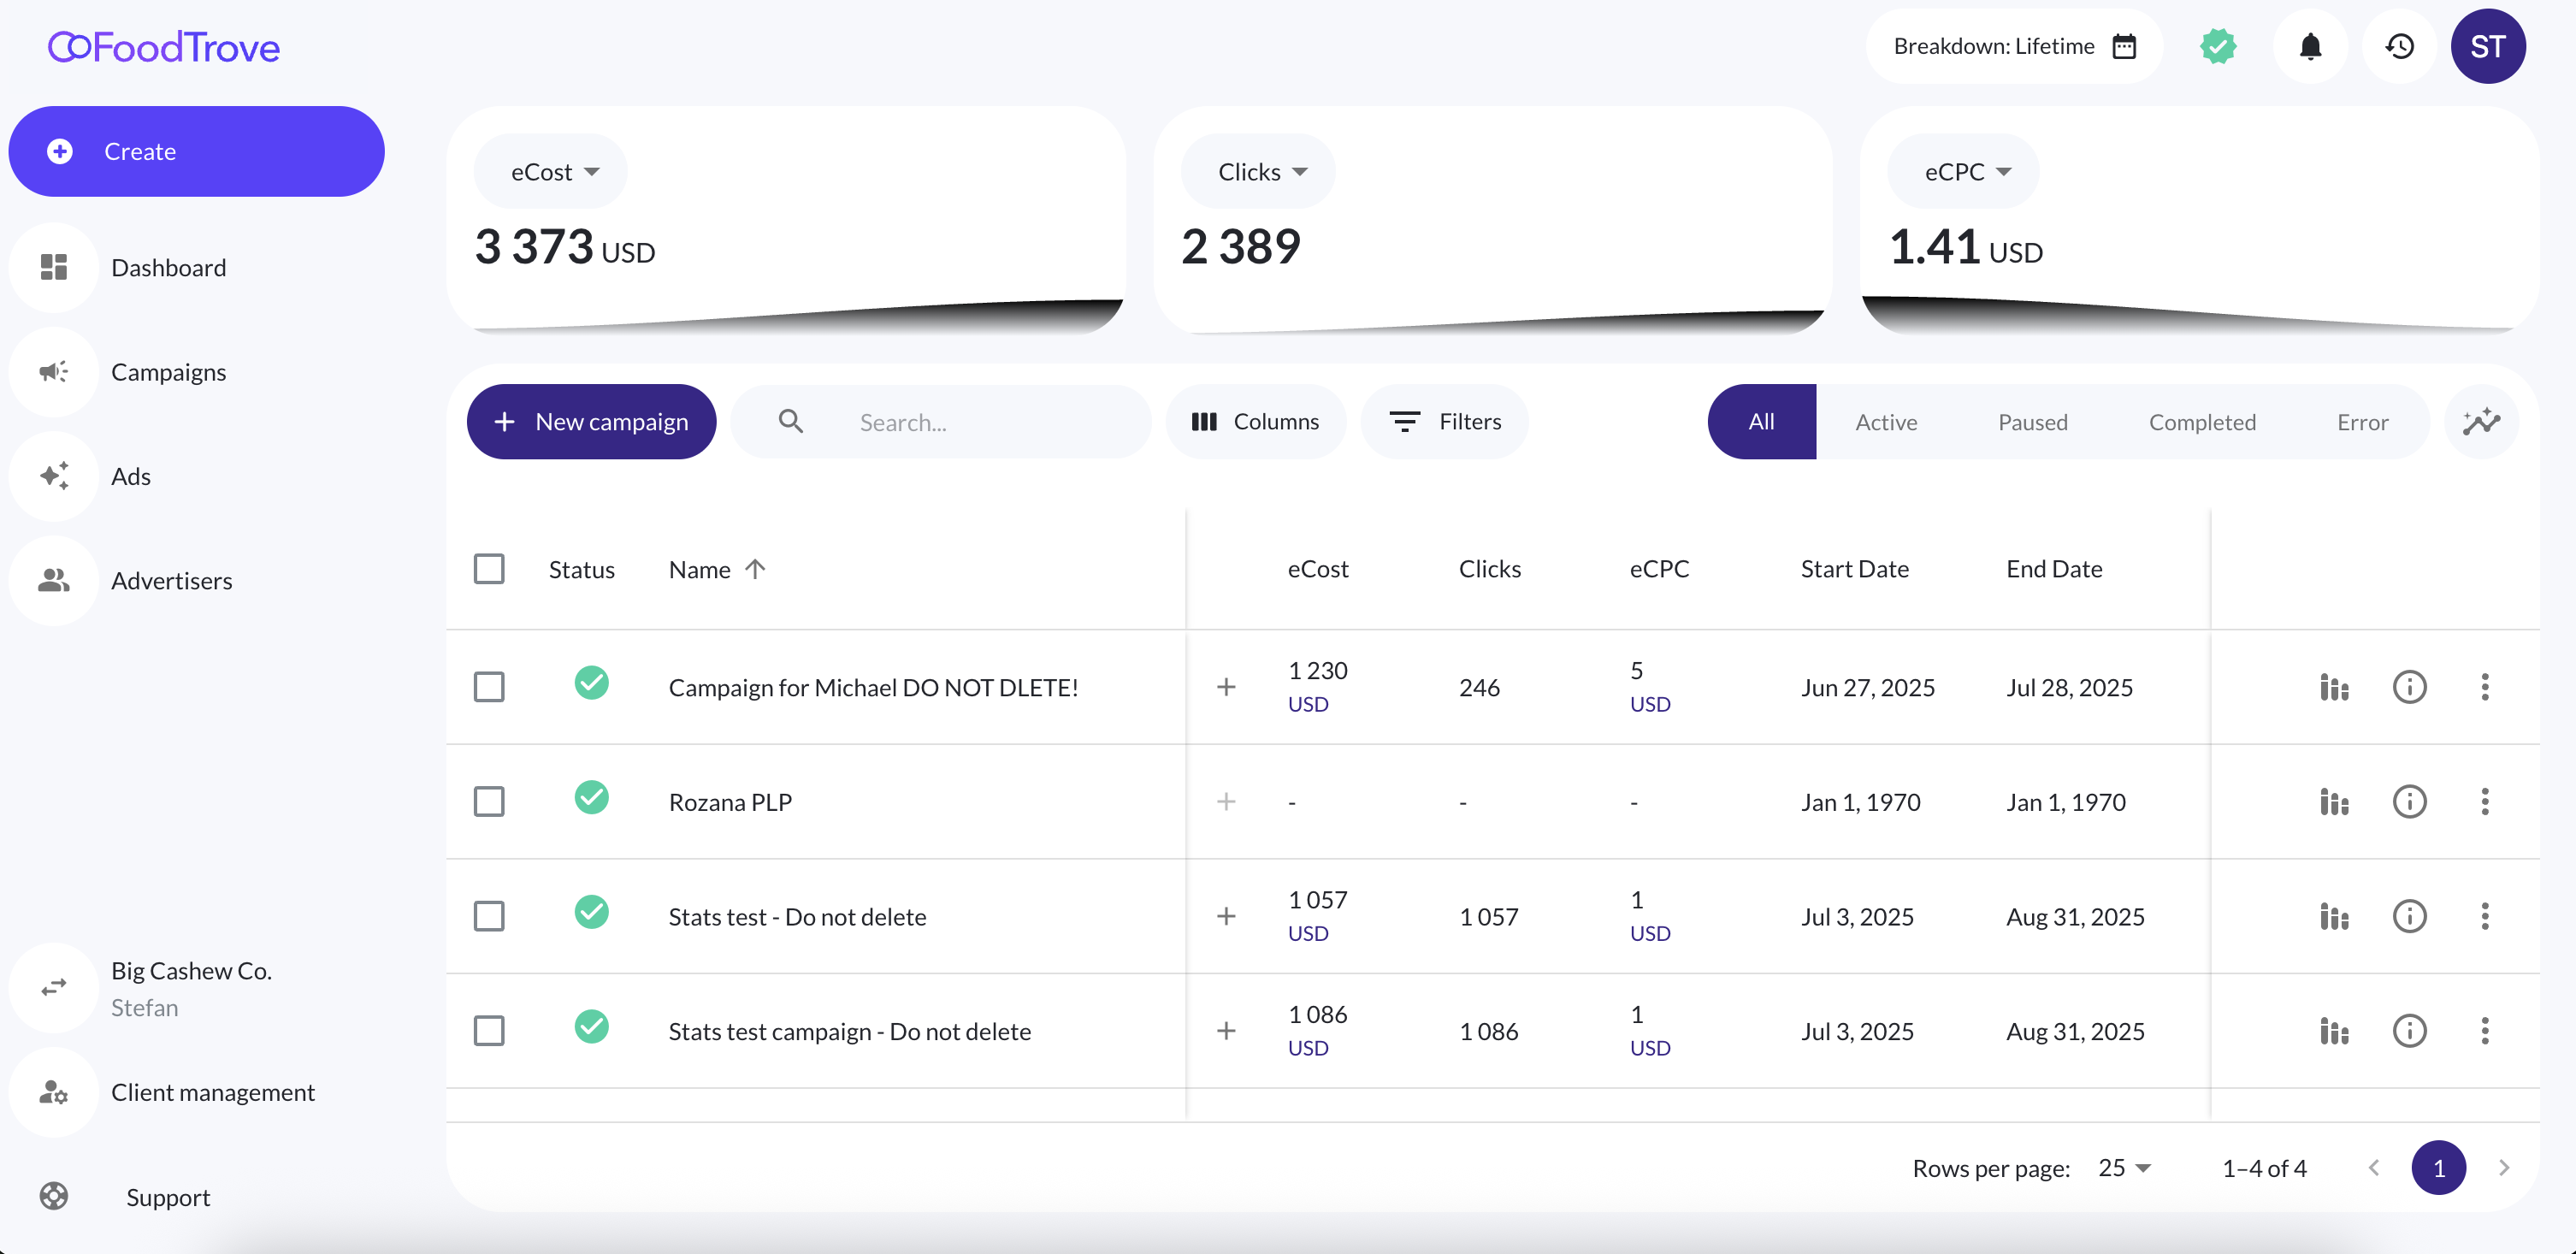
In the product campaigns list view there are widgets on the top of the page for the average metrics for the campaigns that have product stats. The dropdown in each widget can be used to change the metric which that widget displays.
Below that there is the product campaigns list, which shows some of the key metrics in that campaign. The "+" icon in each row shows if there are product stats for each specific campaign: if the icon is disabled that means that there are no product stats for the campaign, otherwise there are. By clicking on the icon, a sub-list opens up (as seen in the below image) with the stats for all the products that campaign contains. By default the metrics that are shown are: CPA, Conversions, Orders, Purchases, and ROAS. Those are the same defaults that are visible in the dashboard widgets.
Updated about 2 hours ago