
Creating Console Campaigns
Campaign Creation Flow
Campaign creation in Console is driven by campaign types -predefined templates that determine the structure and logic of each campaign advertisers can create. These campaign types are configured by the platform owner or publisher (with the help of your Kevel account team) and define key behaviors such as:
- Which channel(s) the campaign runs on (e.g. onsite, Meta, Adform)
- What campaign objectives are supported
- How creatives are generated (e.g. auto-generated from products vs. manually uploaded)
- What targeting rules or audience segments are used
- How budgets, pacing, and placements behave
Key Principles
- Template-based: Advertisers don't start from scratch - they select from prebuilt campaign types tailored to their needs.
- Modular flow: Each campaign follows a guided multi-step builder that adjusts dynamically depending on the selected campaign type.
- AI & automation friendly: Some campaigns (like product campaigns) support fully automated creative generation.
- Configurable & extensible: The number of steps, required inputs, and available settings all depend on how the campaign type is configured on the partner network.
All campaign flows include a right-hand progress menu, which adapts step-by-step based on the campaign type selected.
Onsite Product Campaigns
Product campaigns are a simplified, high-speed campaign type designed for retail advertisers who want to promote individual or multiple SKUs without needing to upload assets or configure targeting manually.
The flow below reflects the default experience when launching a Product Campaign using a product listing ads campaign type.
Creating a product campaign in 30 sec.
Step-by-Step Flow
1. Select Ad Product Template
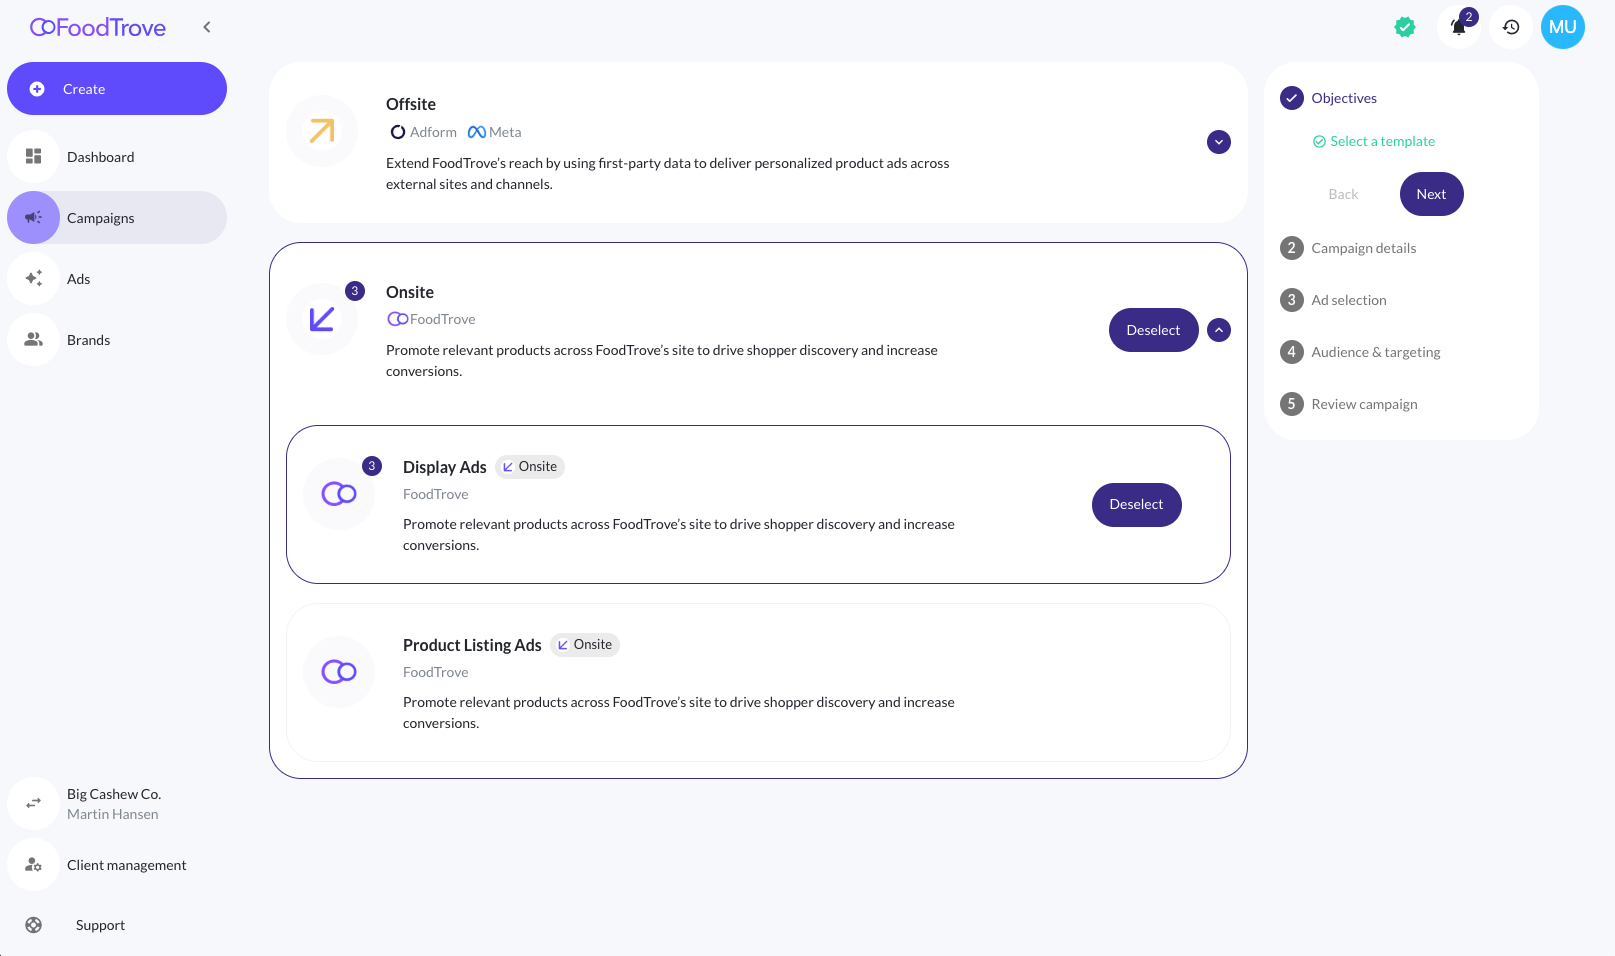
The campaign flow begins with a list of available campaign types, grouped into two categories:
- Offsite (e.g. Adform, Meta)
- Onsite (e.g. display ads, product listing ads)
Each campaign type includes a label (offsite or onsite) and a short description.
→ The user selects product listing ads under Onsite to proceed.
1.1. How to tell it's a product campaign?
The right hand stepper will display Product selection instead of Ad selection.
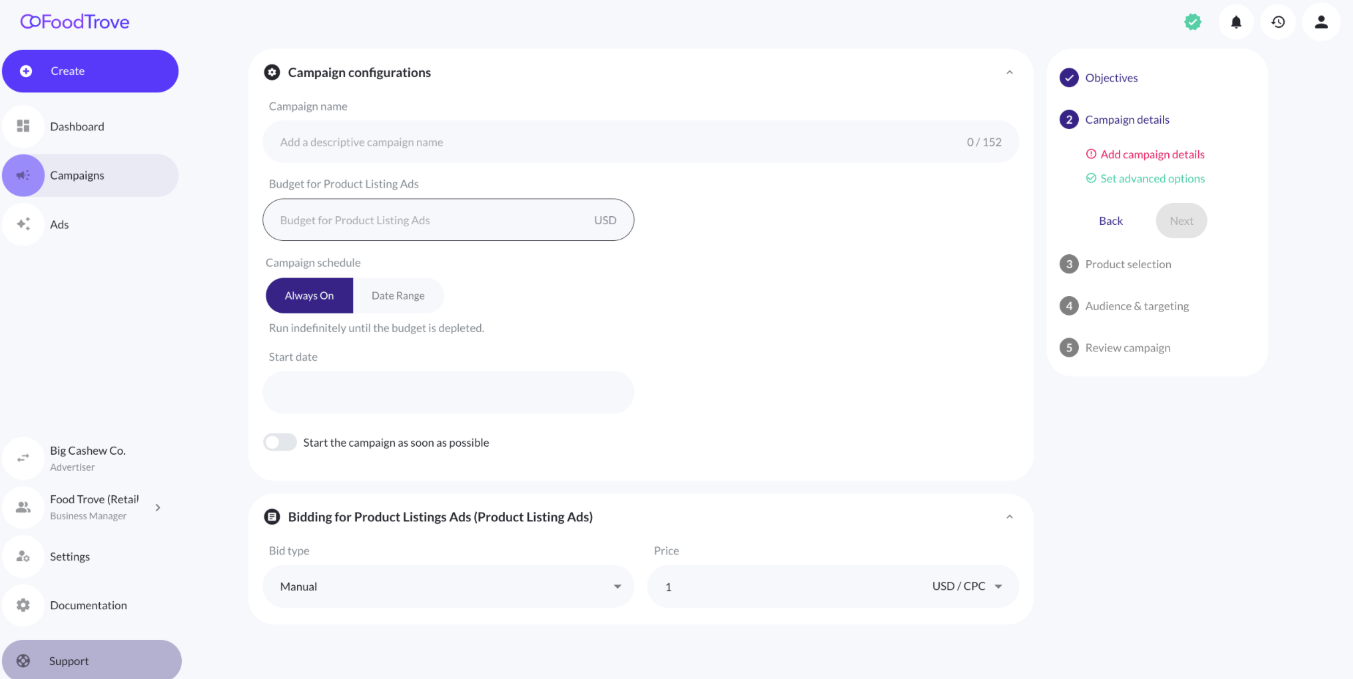
2. Campaign Details
This step defines the core configuration of the campaign, including name, budget, schedule, and bidding strategy.
2.1 Campaign Name
- A campaign name is required.
- It is used in dashboards, tables, and reporting views.
- Maximum length: 152 characters.
2.2 Budget
- A numeric input specifying the total budget for this campaign.
- Currency is pre-set based on network configuration (e.g., USD, EUR, DKK).
2.3 Start & End Date
- Users can choose a start and end date using the calendar picker.
- Optional: Enable “Start the campaign as soon as possible” toggle to skip the manual start date.
- The campaign duration is auto-calculated and shown when both dates are selected.
2.3.1 Optional enddate:
-
If the Media owner wants to enable optional end dates for their advertisers they can do so.
Note: Optional enddate can be enabled or disable depending what the Media Owner wants their advertisers to have available. It is also possible to control the setting on Campaign Type level. Reach out to you CSM for more information.
2.4 Bidding Configuration
- Bidding logic is tied to the campaign type. For campaigns made with this media owner's product listing ad campaign type, the user must choose:
Bid Type:
- Manual: Sets a fixed CPC bid (e.g., $1.00 per click).
- Automatic: Sets a max CPC + ROAS multiple (e.g., $2.00 max CPC with 250% ROAS).
Currency type:
- Bid amount currency is tied to campaign settings and cannot be changed.
Example:
Selecting Automatic bidding with a Max CPC of $2.00 and a ROAS multiple of 250% means the platform will optimize for return while respecting your max CPC ceiling.
3. Product Selection
This step defines the set of products to promote during the campaign.
Manual Selection
Users can browse, search, and filter the product catalog to manually select the items they want to advertise.
Key Features:
-
Search Bar Search for products by name, ID, or other attributes.
-
Filters Apply advanced filters based on fields like:
- Brand ID
- Category
- Price or Sale Price
- Star Rating
- Name or Brand Name
-
Actions Menu Power features for bulk management:
- Select all visible items
- Bulk select by product ID: Paste comma-separated or newline-separated IDs, or upload a CSV
- Export shown products as CSV
- Bulk remove by product ID
- Bulk edit bid by product ID
- Edit bid for selected products
-
Custom Bids
- During import, users can enable a toggle to assign a custom bid per product
- Once selected, individual product bids can be edited directly in the list
-
Product Selection Interface
- The left panel displays all products
- The right panel holds the selected products
- Products are added or removed via the > and < buttons
- Total number of selected products is tracked at the top
Once the product selection is finalized, the user clicks Next to continue to Audience & Targeting.
Define Product Set
Instead of selecting specific products manually, users can define a dynamic product set that updates automatically throughout the campaign’s lifetime.

What is a Product Set?
A product set is a dynamic filter-based rule that determines which products are eligible for promotion. Products are included or excluded in real-time based on whether they match the configured filters.
This approach is ideal for "always-on" or scalable campaigns where eligible products may change due to inventory, pricing, categories, or metadata updates.
Key Features
-
Dynamic Matching Products are automatically added or removed as the catalog changes - no need to manually update the campaign.
-
Filter Builder Create conditions using any combination of product attributes. For example:
- Category = “Chips”
- Price < 5
- Brand Name = “Cocoyum”
- Sale_price > 1
-
Multi-Condition Support Add multiple filters using logical AND combinations to precisely target a group of products.
-
Live Preview A real-time count and preview of matching products are displayed below the filter builder.
How to Use
-
Select the Define product set tab in the product selection step.
-
Use the filter builder to define your rules:
- Select a field (e.g. Brand, Price, Category)
- Choose an operator (is, greater than, etc.)
- Enter a value
-
Click Search to preview products matching your filter.
-
Review the dynamically updated product grid.
-
When ready, click Next to continue to the Audience & Targeting step.
4. Audience & Targeting
In this step, you define who the campaign should reach and under what contextual conditions. Targeting options allow you to narrow the campaign scope for higher relevance and performance.
This step includes three modules for Product Campaigns:
- Location targeting
- Keyword targeting
- Bid modifiers
NoteLocations, audiences, keywords, and bid modifiers can all be pre-configured at the campaign type level. The available options in this step will dynamically adjust based on the partner setup and campaign template.
4.1. Location Targeting
Use this section to limit campaign delivery by country, (Region, City, Zip or LatLong is available via the integrations).
- Start typing a country name to search.
- Select one or multiple countries.
- Use Remove or Remove all to adjust selections.
4.2. Keyword Targeting
Target ads based on contextual keywords - like search terms or site categories - available in the ad request.
- Enter keywords manually, separated by commas or spaces.
- This ensures ads are only triggered when the request matches one or more of the defined keywords.
4.3. Bid Modifiers
Boost or adjust bids dynamically when certain targeting criteria are met.
- Click Add bid modifier
- Define targeting rules (e.g. device, placement, keyword)
- Set the bid adjustment percentage (increase or decrease)
This allows the campaign to spend more efficiently where it matters most - for example, raising bids for mobile placements or specific high-converting search terms.
5. Review Campaign
The final screen provides a summary of the campaign:
- Selected campaign type
- Campaign name
- Chosen products
→ The user reviews the details and clicks Launch campaign.
The campaign is now live and just needs to be activated in the campaign list.
Notes on Behavior
- Product campaigns are auto-configured based on the campaign type logic.
- Targeting, placements, and creative rendering are handled automatically.
- This flow supports rapid campaign creation, often in under 30 seconds.
- Designed for non-technical users and brand managers.
Onsite Display Ad Campaigns
Display campaigns are used to promote manually created ads—such as banners, HTML creatives, or native units - across eligible placements. This campaign type does not involve a product catalog and instead relies on pre-uploaded or newly created ads.
The overall campaign creation structure mirrors the product campaign flow, with the key difference being Step 3: Ad selection.
Onsite Display Campaign in 30 sec.
Flow Overview
The campaign creation flow for Display Ads includes the following steps:
- Objectives – Select the appropriate ad product (e.g. Onsite Display Ads or Offsite Adform)
- Campaign details – Define the campaign name, budget, schedule, and bidding
- Ad selection - Choose or upload the creatives for this campaign
- Audience & targeting – Define targeting by location, keyword, and modifiers
- Review campaign – Final summary before launch
3. Ad Selection (Key Difference)
Unlike product campaigns, where users select SKUs or product sets, Display campaigns require a user to assign or upload ads directly.

Option A: Select from Existing Ads
If ads have already been uploaded via the ad library (see Ad Builder documentation), they will appear in the ad selection interface.
- Use search, filters, or sorting to find the correct creatives.
- Select one or more ads to attach to the campaign.
Option B: Upload or Create New Ads
If no suitable creatives exist, the user can create or upload new ones during this step:
-
Supported ad types include:
- Static images (JPG, PNG)
- HTML banners
- Script-based tags (3rd party)
- Native ads (Google, Meta, etc.)
-
Upload options and formatting requirements are controlled by the campaign type template and platform setup.
Remainder of Flow
Steps 1, 2, 4, and 5 in the display flow are functionally identical to product campaigns:
- Campaign details includes budget, start/end dates, and bid type (manual or automatic).
- Audience & targeting supports location filters, contextual keywords, and bid modifiers.
- Review campaign provides a final summary before launch.
Multi-Booking Campaign Flow
The multi-booking flow allows users to launch campaigns that use two or more campaign types at the same time. This creates a campaign set - a bundled group of campaigns - that can be governed with cross-campaign logic, including:
- Budget reallocation optimization
- Automated rules
- Performance-based pacing
Multibooking in 30 sec.
In the example below we are booking a onsite product listing campaign and an offsite meta audience reach campaign at the same time.
How it Works
When multiple campaign types are selected in the Objectives step, the campaign builder dynamically adapts to support a single unified flow.
The experience simplifies to the lowest common denominator across the selected campaign types, ensuring that:
- Product-based steps are shown if any selected campaign type uses a catalog
- Ad selection is included if manual/display ads are involved
- Targeting and bidding logic reflect (if possible) the shared settings across all selected campaign types
Example
If a user selects both:
- Onsite Product Listing Ads (requires product selection)
- Retail Audience Reach on Meta (requires ad builder / ad selection)
…the campaign builder will consolidate into a unified flow that:
- Requires product selection (for product-based ad types)
- Requires ad selection or upload /create (for Native-based ad types)
- Shares common details like campaign name, budget, and targeting
Campaign Set Behavior
Once launched:
- Each campaign type is deployed as its own campaign under the campaign set
- The campaign set can be managed holistically in reporting and optimization tools
- Cross-campaign logic (e.g. budget distribution or rule-based reallocation) can be applied based on network settings
This flow enables advertisers to seamlessly run multi-channel campaigns (onsite + offsite, product + display) in a single setup, without duplicating effort.
Updated 3 months ago